
With many advances to Photoshop over the earlier fairly a couple of years, eradicating the background from a picture has under no circumstances been simpler or sooner. This text goes to present you the whole totally different strategies of straightforward methods to take away the background of an image in Photoshop.
Figuring out the best methodology to make the most of for the kind of picture you’re working with is essential to getting the best outcomes with the best approach accessible.
Listed under are seven methods to take away backgrounds out of your footage utilizing Adobe Photoshop Inventive Cloud and when to make use of every approach to realize the best outcomes.
Key Takeaways
- Profit from Photoshop’s AI-powered Take away Machine for a fast, one-click background elimination expertise, fantastic for simple duties.
- Make use of the Object Choice Machine for computerized topic detection and background elimination, leveraging Adobe Sensi AI for precision.
- Go for the Fast Motion attribute when tempo is important, although be ready for most definitely loads a lot much less accuracy with tough footage.
- Use the Background Eraser Machine to manually administration the elimination course of, preferrred for prime distinction footage the place detailed adjustment is required.
- The Pen Machine gives among the finest diploma of administration for separating issues from intricate backgrounds, although it requires further time and precision.
- Take into consideration the Magnetic Lasso Machine for issues with tough edges in opposition to high-contrast backgrounds, permitting for semi-automatic edge detection and sooner processing.
New to Photoshop in 2023 are fairly a couple of enhancements to this methodology due to AI. A kind of enhancements is their new Take away Machine, which because it’s doable you will inform by the title, helps you take away factors out of your footage.
This instrument may be very like Photoshop’s Object Choice Machine (talked about under), whereas taking it a step additional to realize precisely what you’re in quest of, which is to take away the background.
Relying on what you’re attempting to take away, it is doable you will every take away objects, or in our case, take away the background solely.
Must you happen to’re attempting to take away the background in a picture in Photoshop utilizing merely only a few clicks, utilizing the Take away Machine and harnessing its AI energy is a simple approach to accumulate the consequence you need.
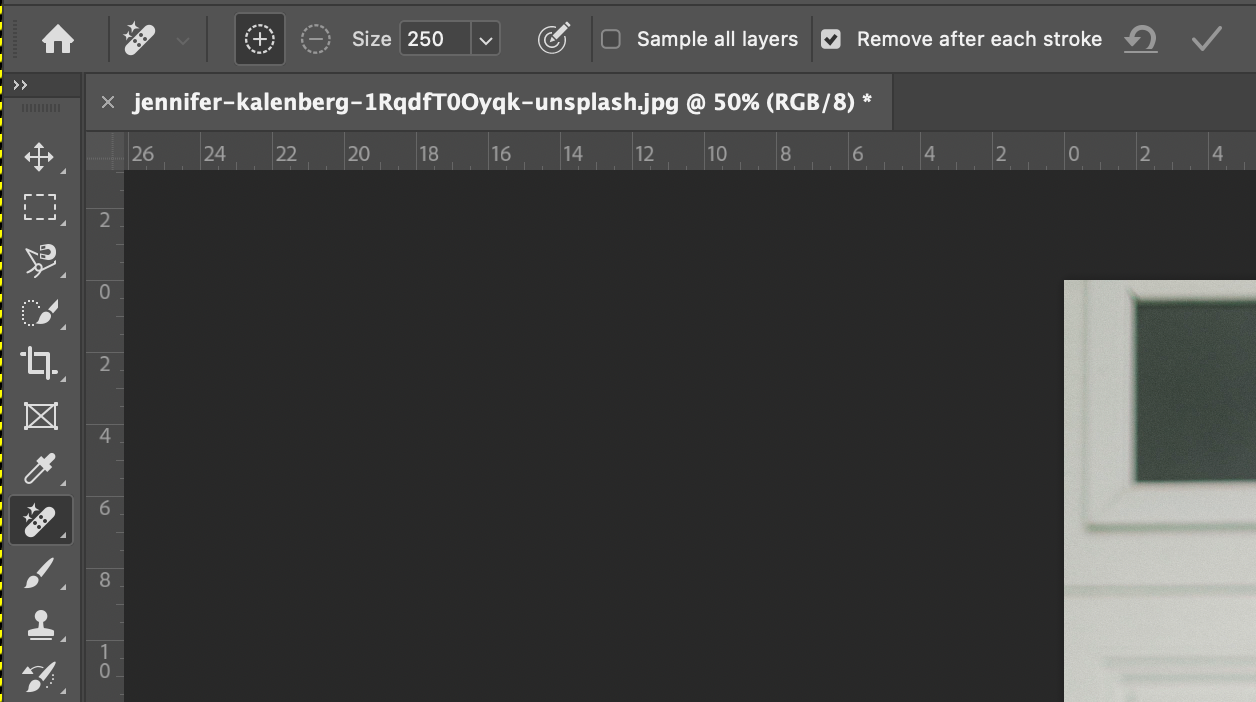
Take away Machine Steps
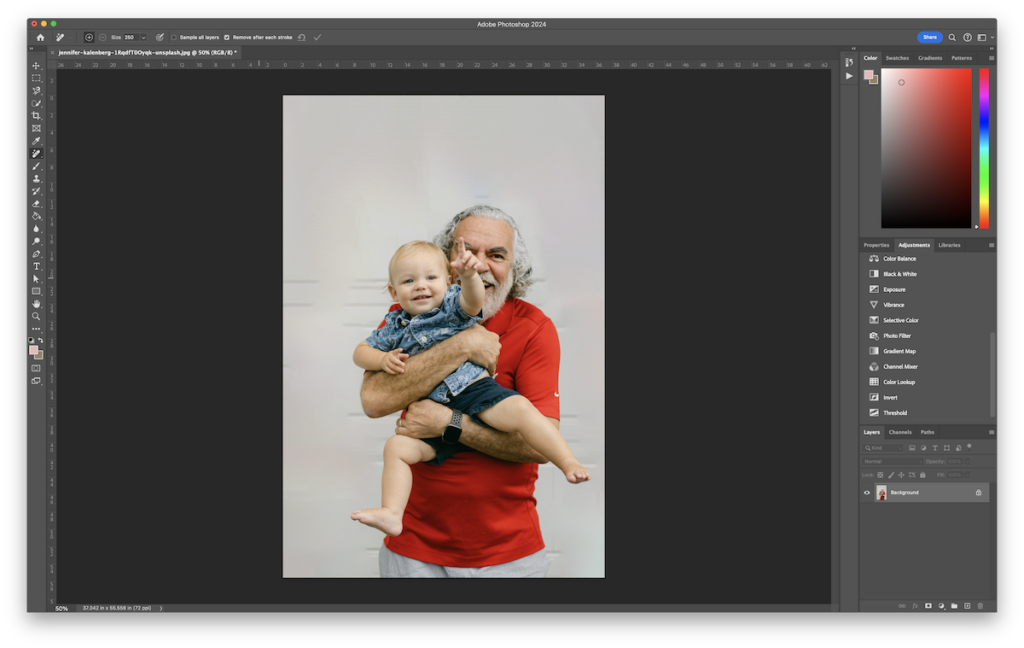
We’re going to take away the background from this picture:

- Choose the “Take away Machine” (discovered contained in the instrument drawer with the Spot Therapeutic Brush).
- Beneath your picture, you’ll see a space seem with only a few buttons. With out one factor chosen in your picture, choose “Take away Background.”
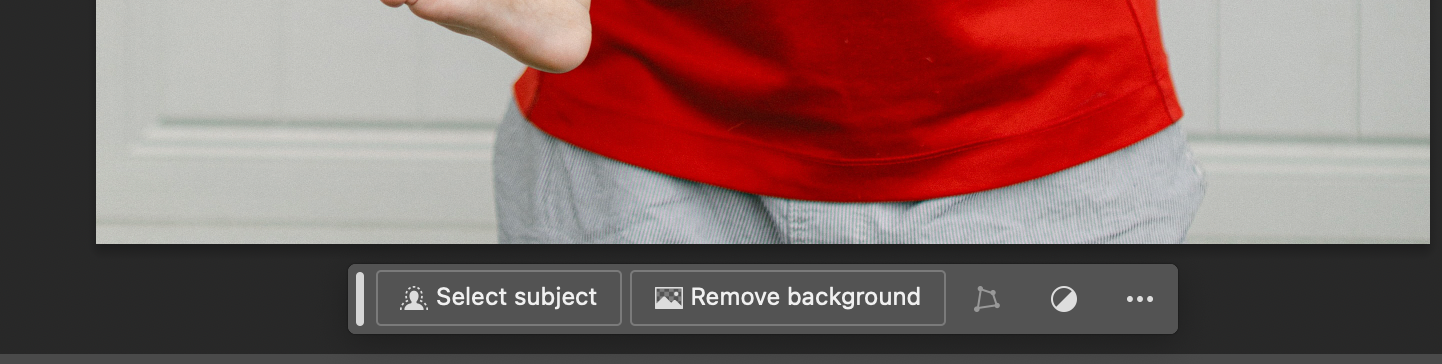
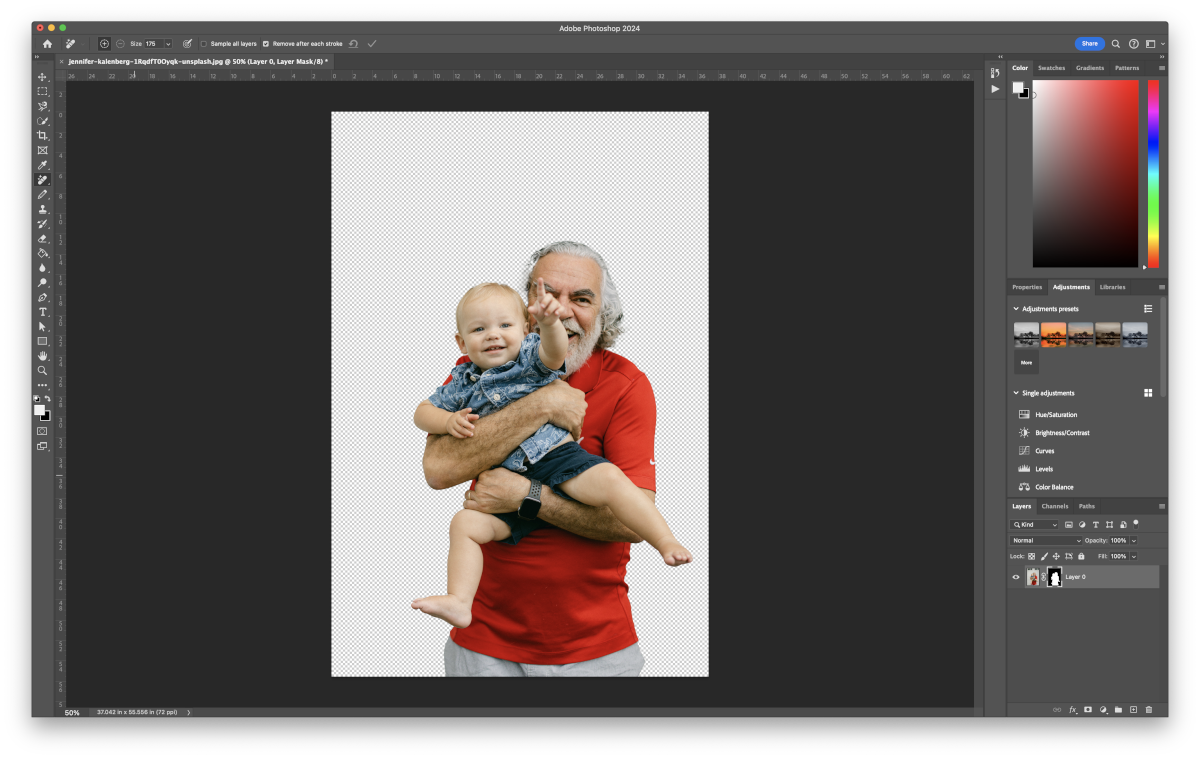
- You’ll now see the background has been eradicated out of your picture.
- To refine the edges, it is doable you will alternate between the “Subtract from Masks” and “Add to Masks” picks under the picture. Subtract from Masks must be used to take away any remaining background that is perhaps left behind. Add to Masks must be utilized in order in order so as to add as soon as extra any of your topic which might have been by accident eradicated.
Observe: Must you need to do that in a non-destructive approach, make sure you copy your background layer so that you need to use the Take away Machine on the copy layer and on no account the distinctive background layer.
The Take away Machine is useful to take away your background out of your picture utilizing AI with only one click on on on of a button. Nonetheless, it does have the flexibleness to have the ability to “paint” what you need eradicated and the instrument decides what you meant by that.
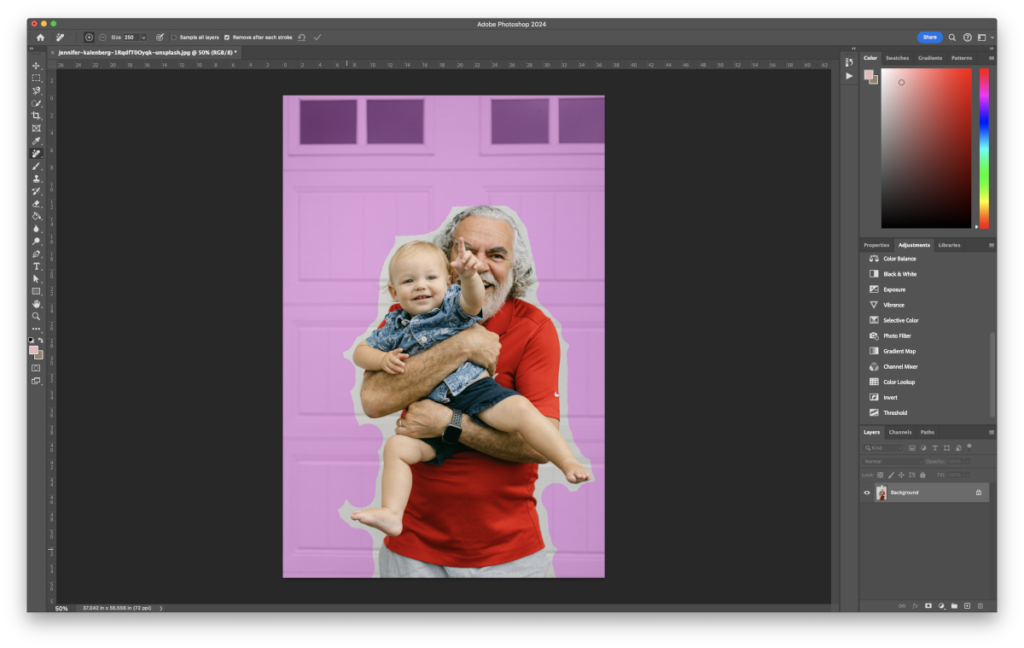
For instance, contained in the picture above I “painted” the background multi carry out stroke, with out letting go. As quickly as I let go, Photoshop then calculated from there on easy methods to take away the background.
The result’s that it kind of “smoothed” out the background (for mainly primarily probably the most half) instead of eradicating it solely, as confirmed above.
This may be useful in case you are working with a busy background nonetheless don’t mainly need it fully eradicated to transparency, nonetheless doing this method does take additional time and work to color it, edit the consequence, and get it to look precisely the way in which by which throughout which you need.
The Take away Machine could also be useful for eradicating objects as efficiently, not merely backgrounds. For added info on that, take a look at the Photoshop documentation article: https://helpx.adobe.com/photoshop/utilizing/tool-techniques/remove-tool.html
Picture Credit score rating score: Jennifer Kalenberg on Unsplash.
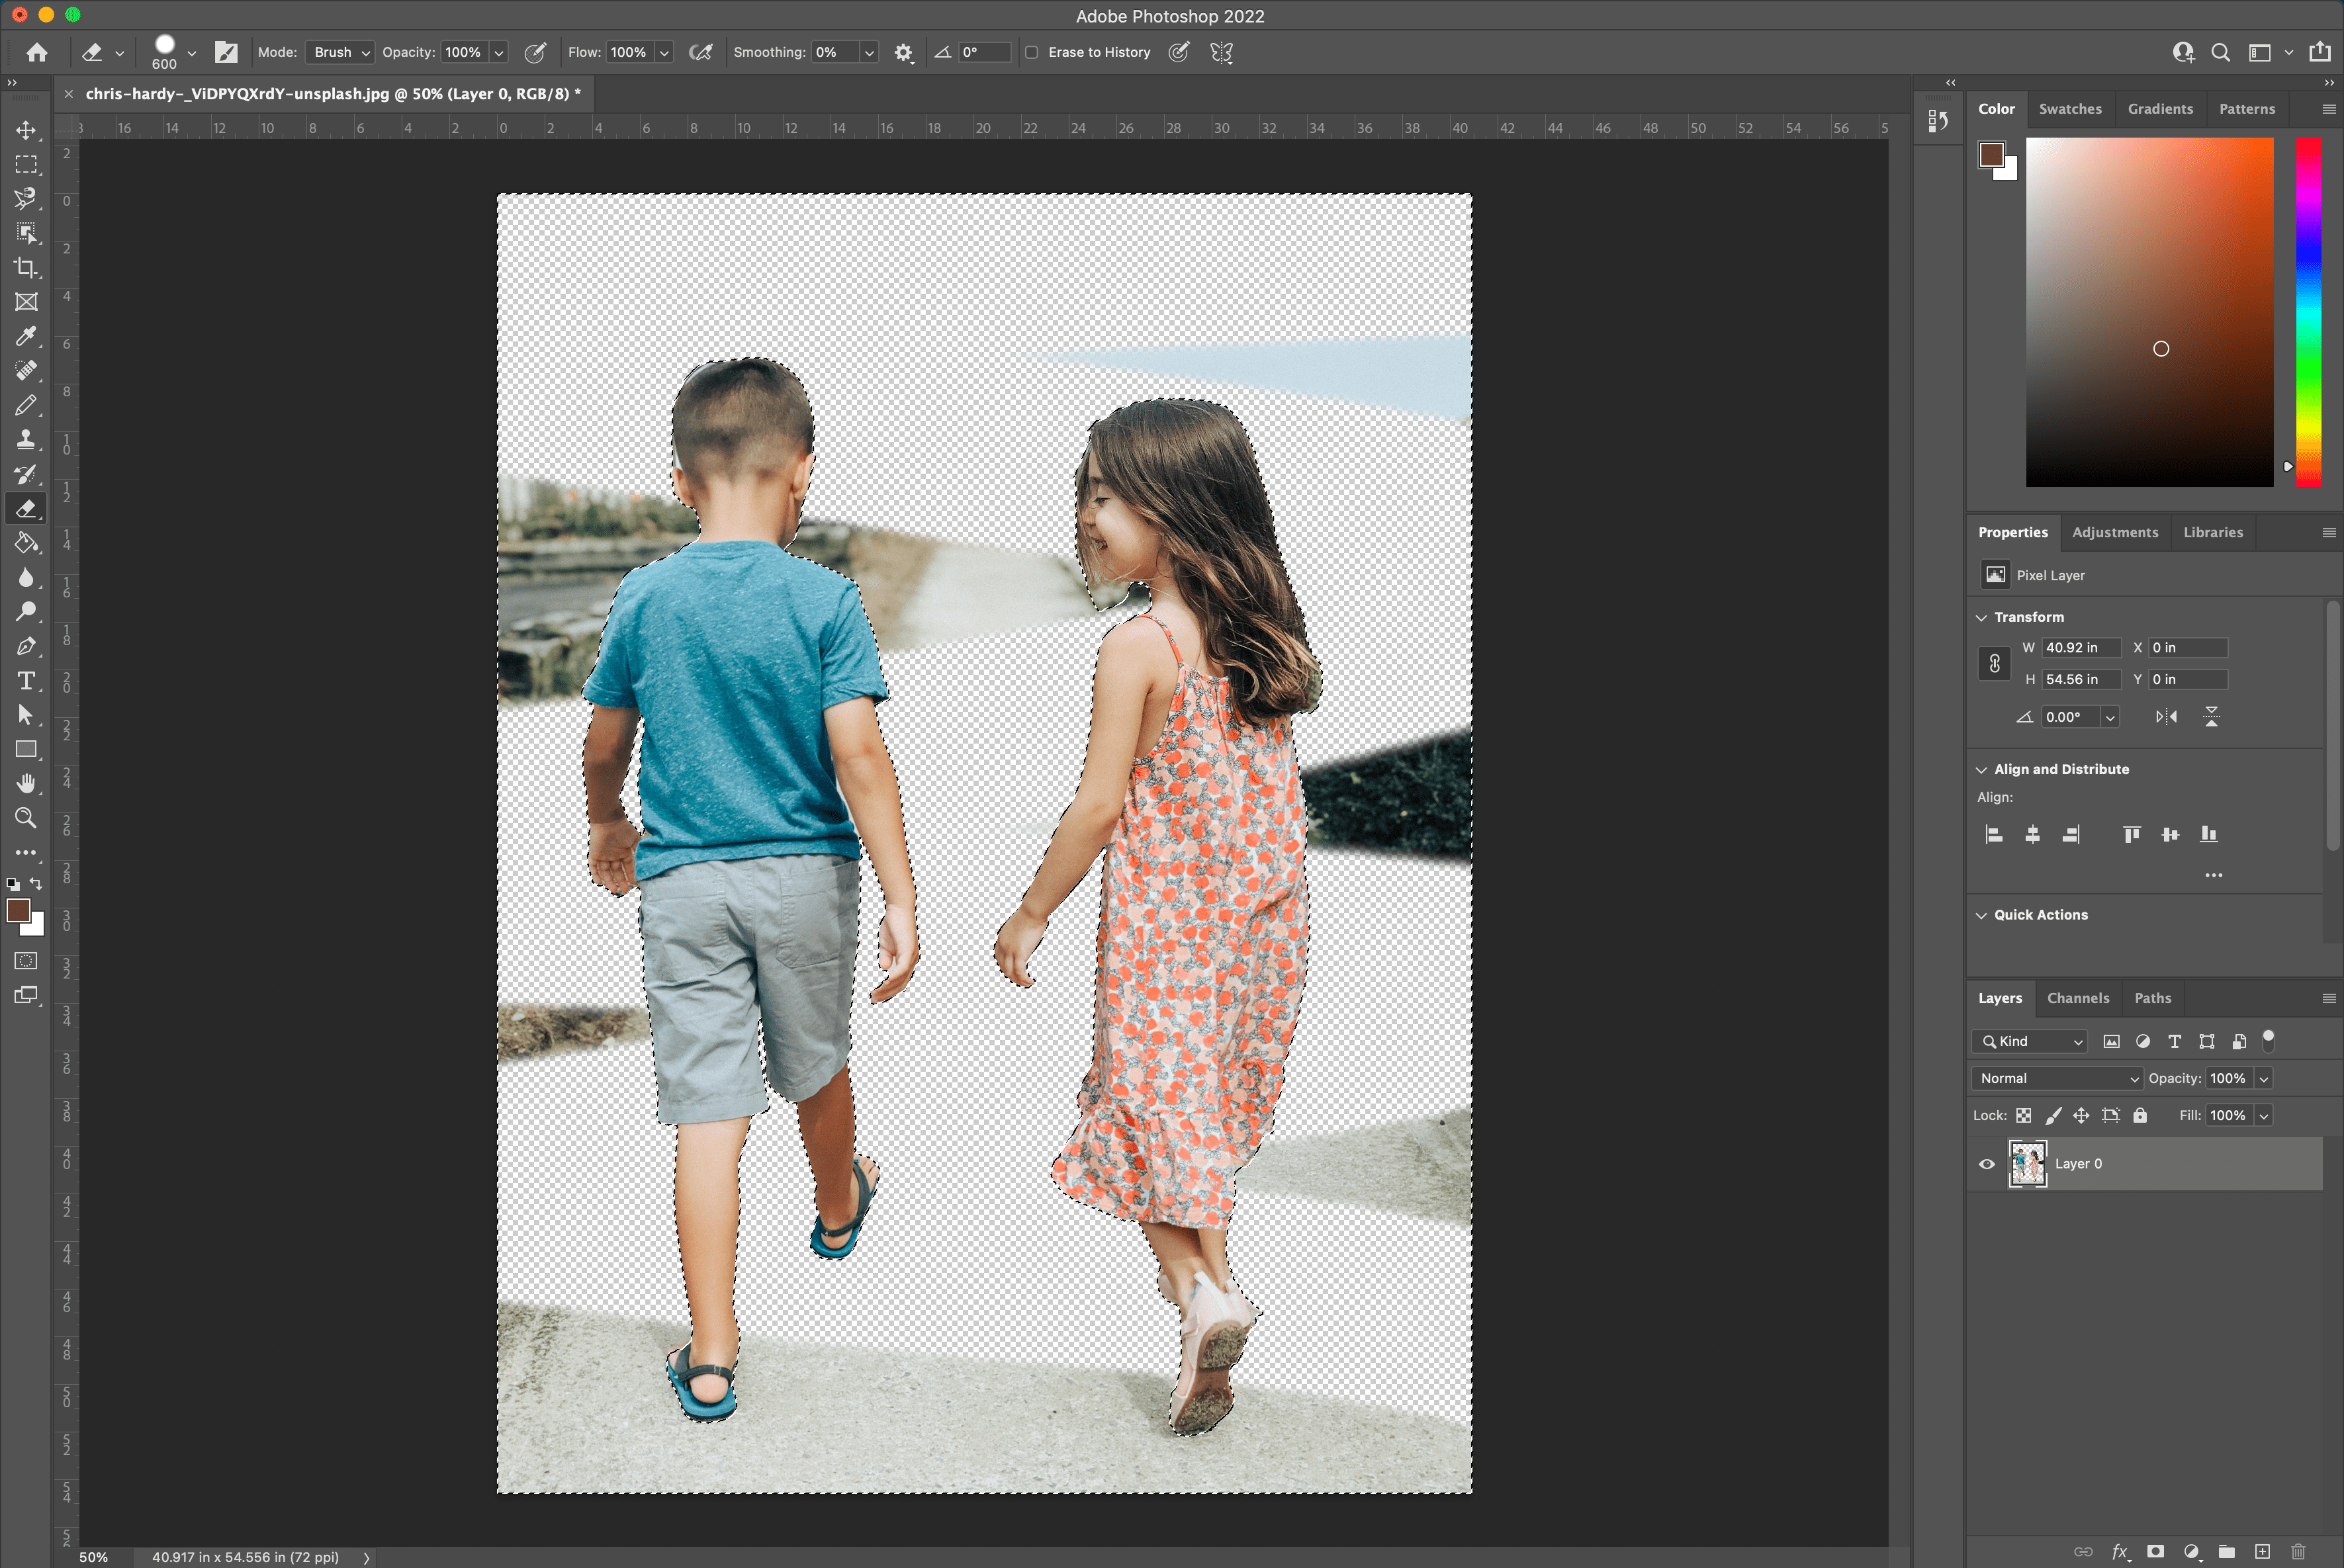
A number of of the distinctive selections to have come to Photoshop is the mannequin new Object Choice instrument, which is new to Photoshop 2022. The Object Choice instrument makes use of Adobe Sensi AI expertise to do virtually the whole be merely greatest for you decide on the topic in your footage.
Object Choice Machine Steps
- Open your {{photograph}} in Photoshop and choose the Object Choice instrument contained in the toolbar on the left (throughout the an similar menu as Fast Choice Machine).
- Now, hover your cursor over your topic and look forward to it to point blue. (Change your cursor in tiny circles if it doesn’t instantly flip blue.)
- Instantly, your topic is able to be chosen.
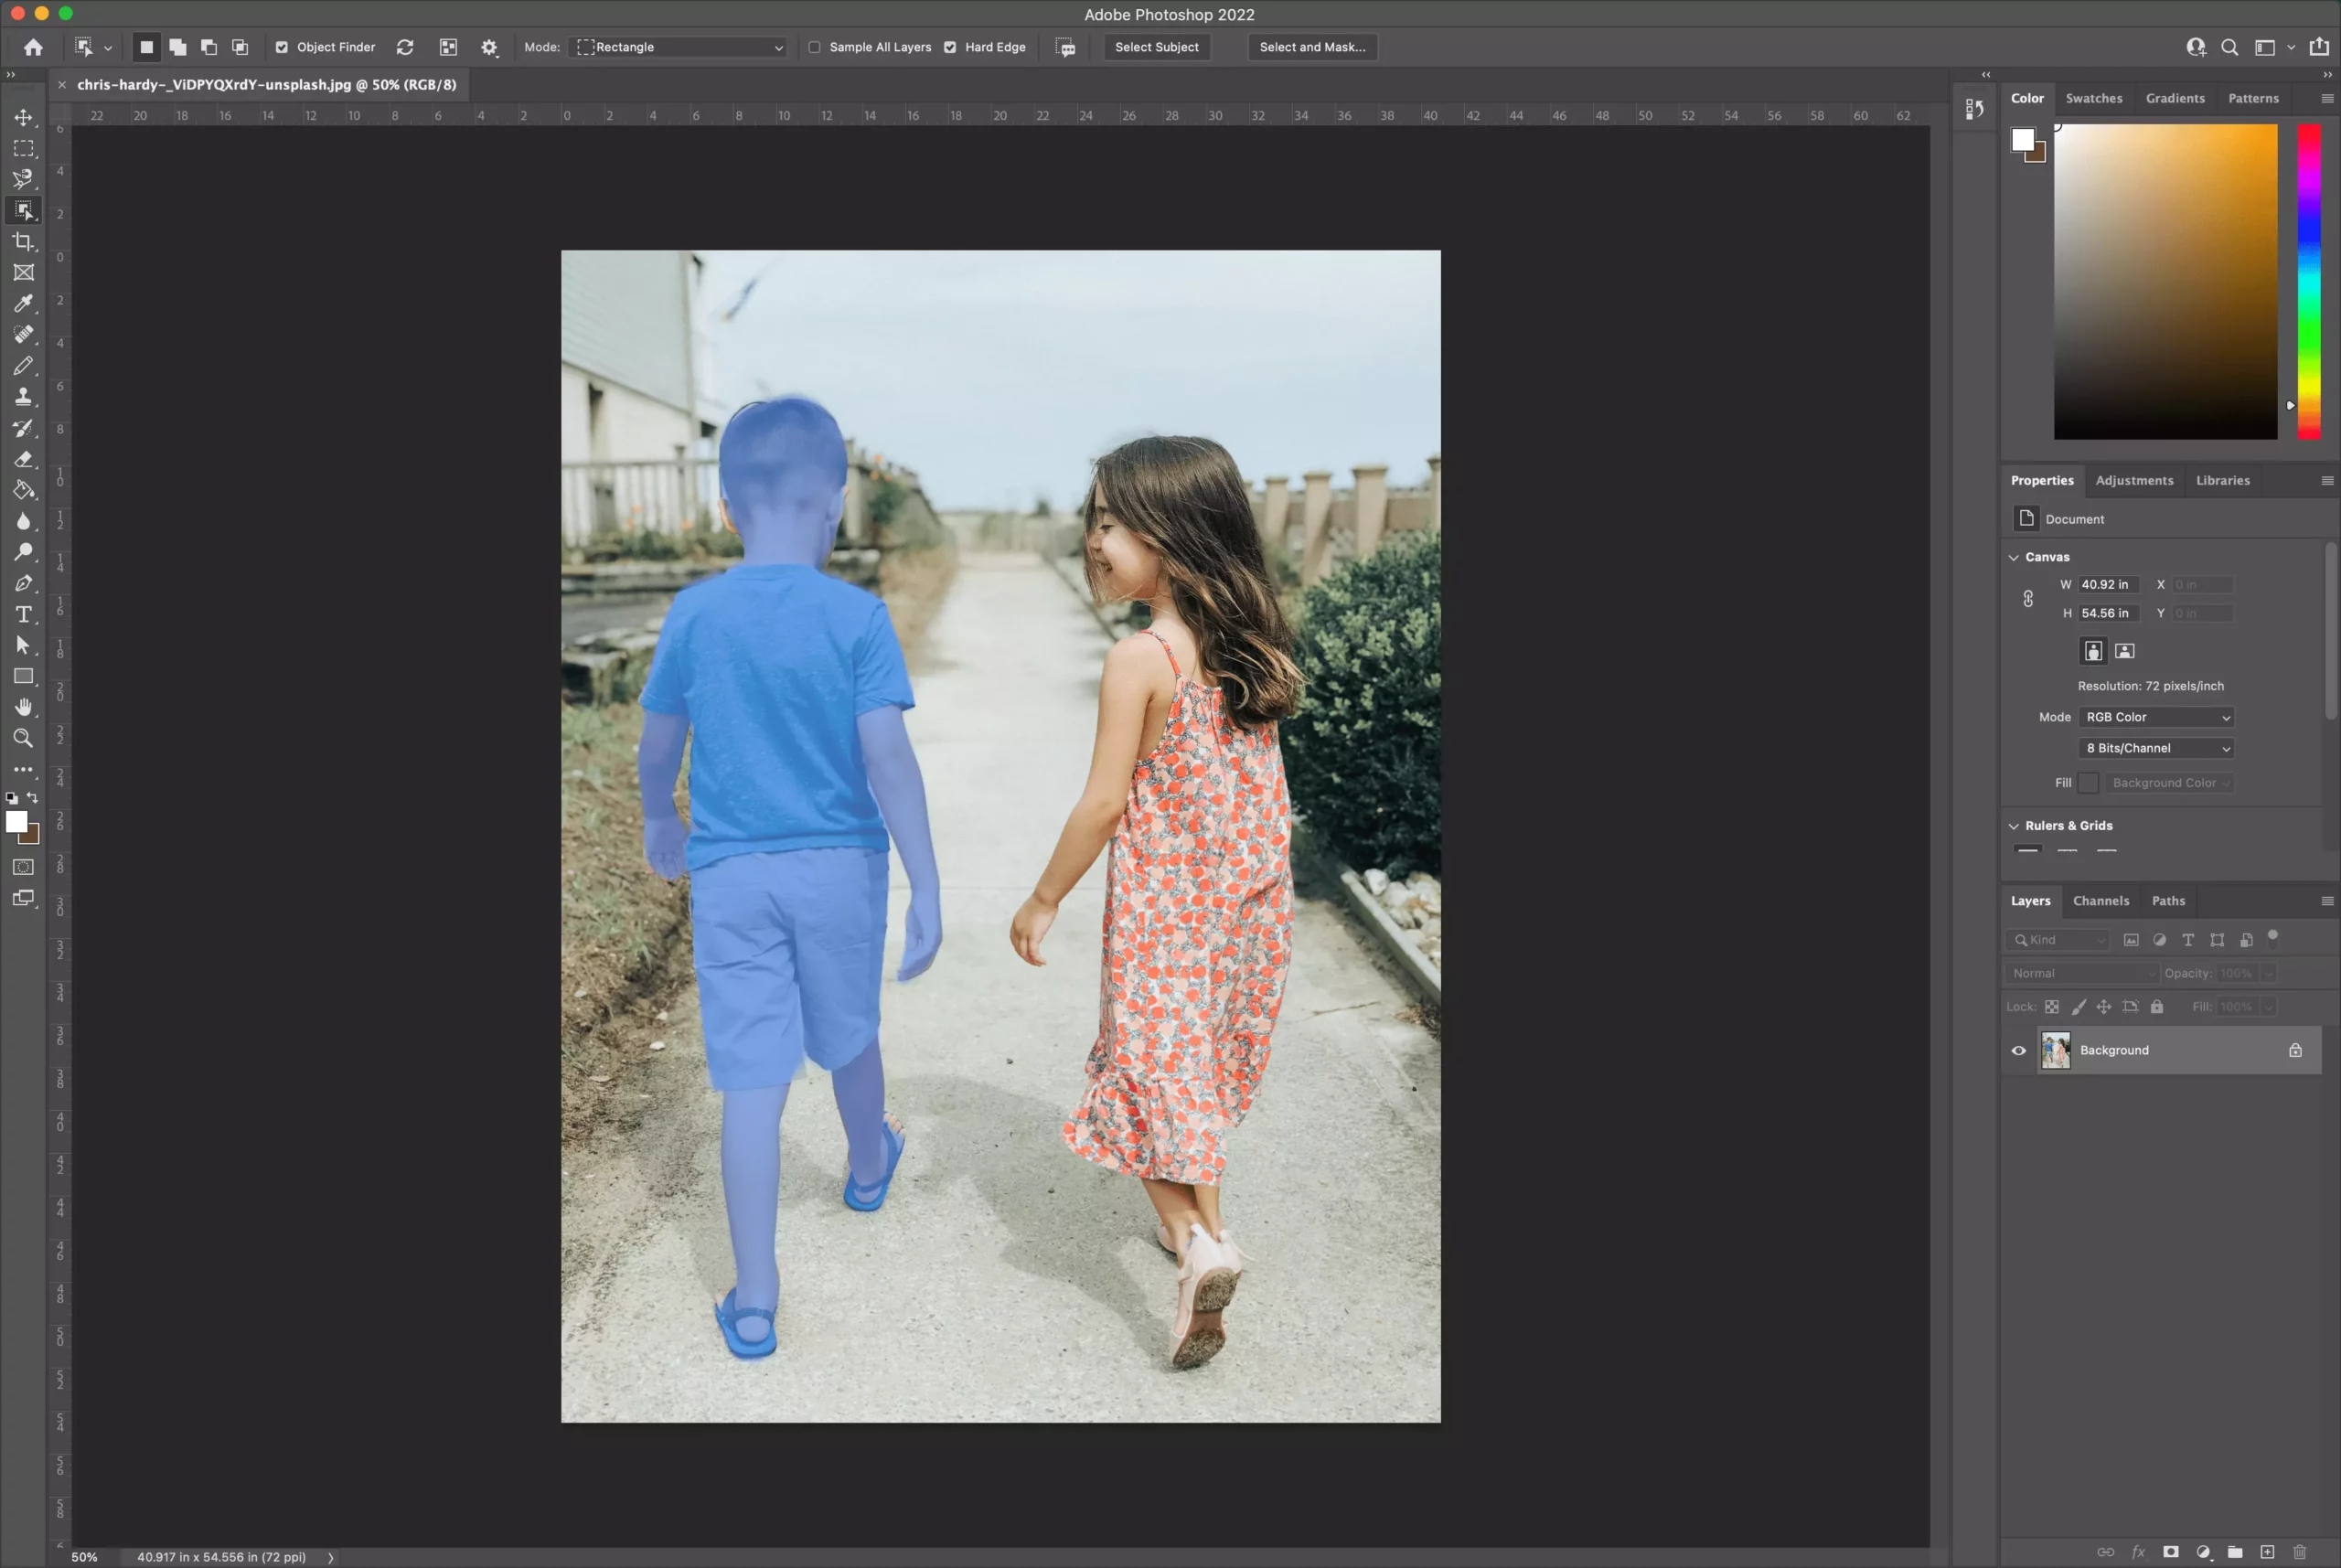
- To erase background provides from correct proper right here, press the shift key whereas deciding on all objects you’d need to hold contained in the {{photograph}}. This shortcut will auto-select every object for you (displaying you the marching ants spherical every entity).
- Subsequent, go to Choose > Inverse to invert the choice (that signifies that your background is now chosen instead of your objects).
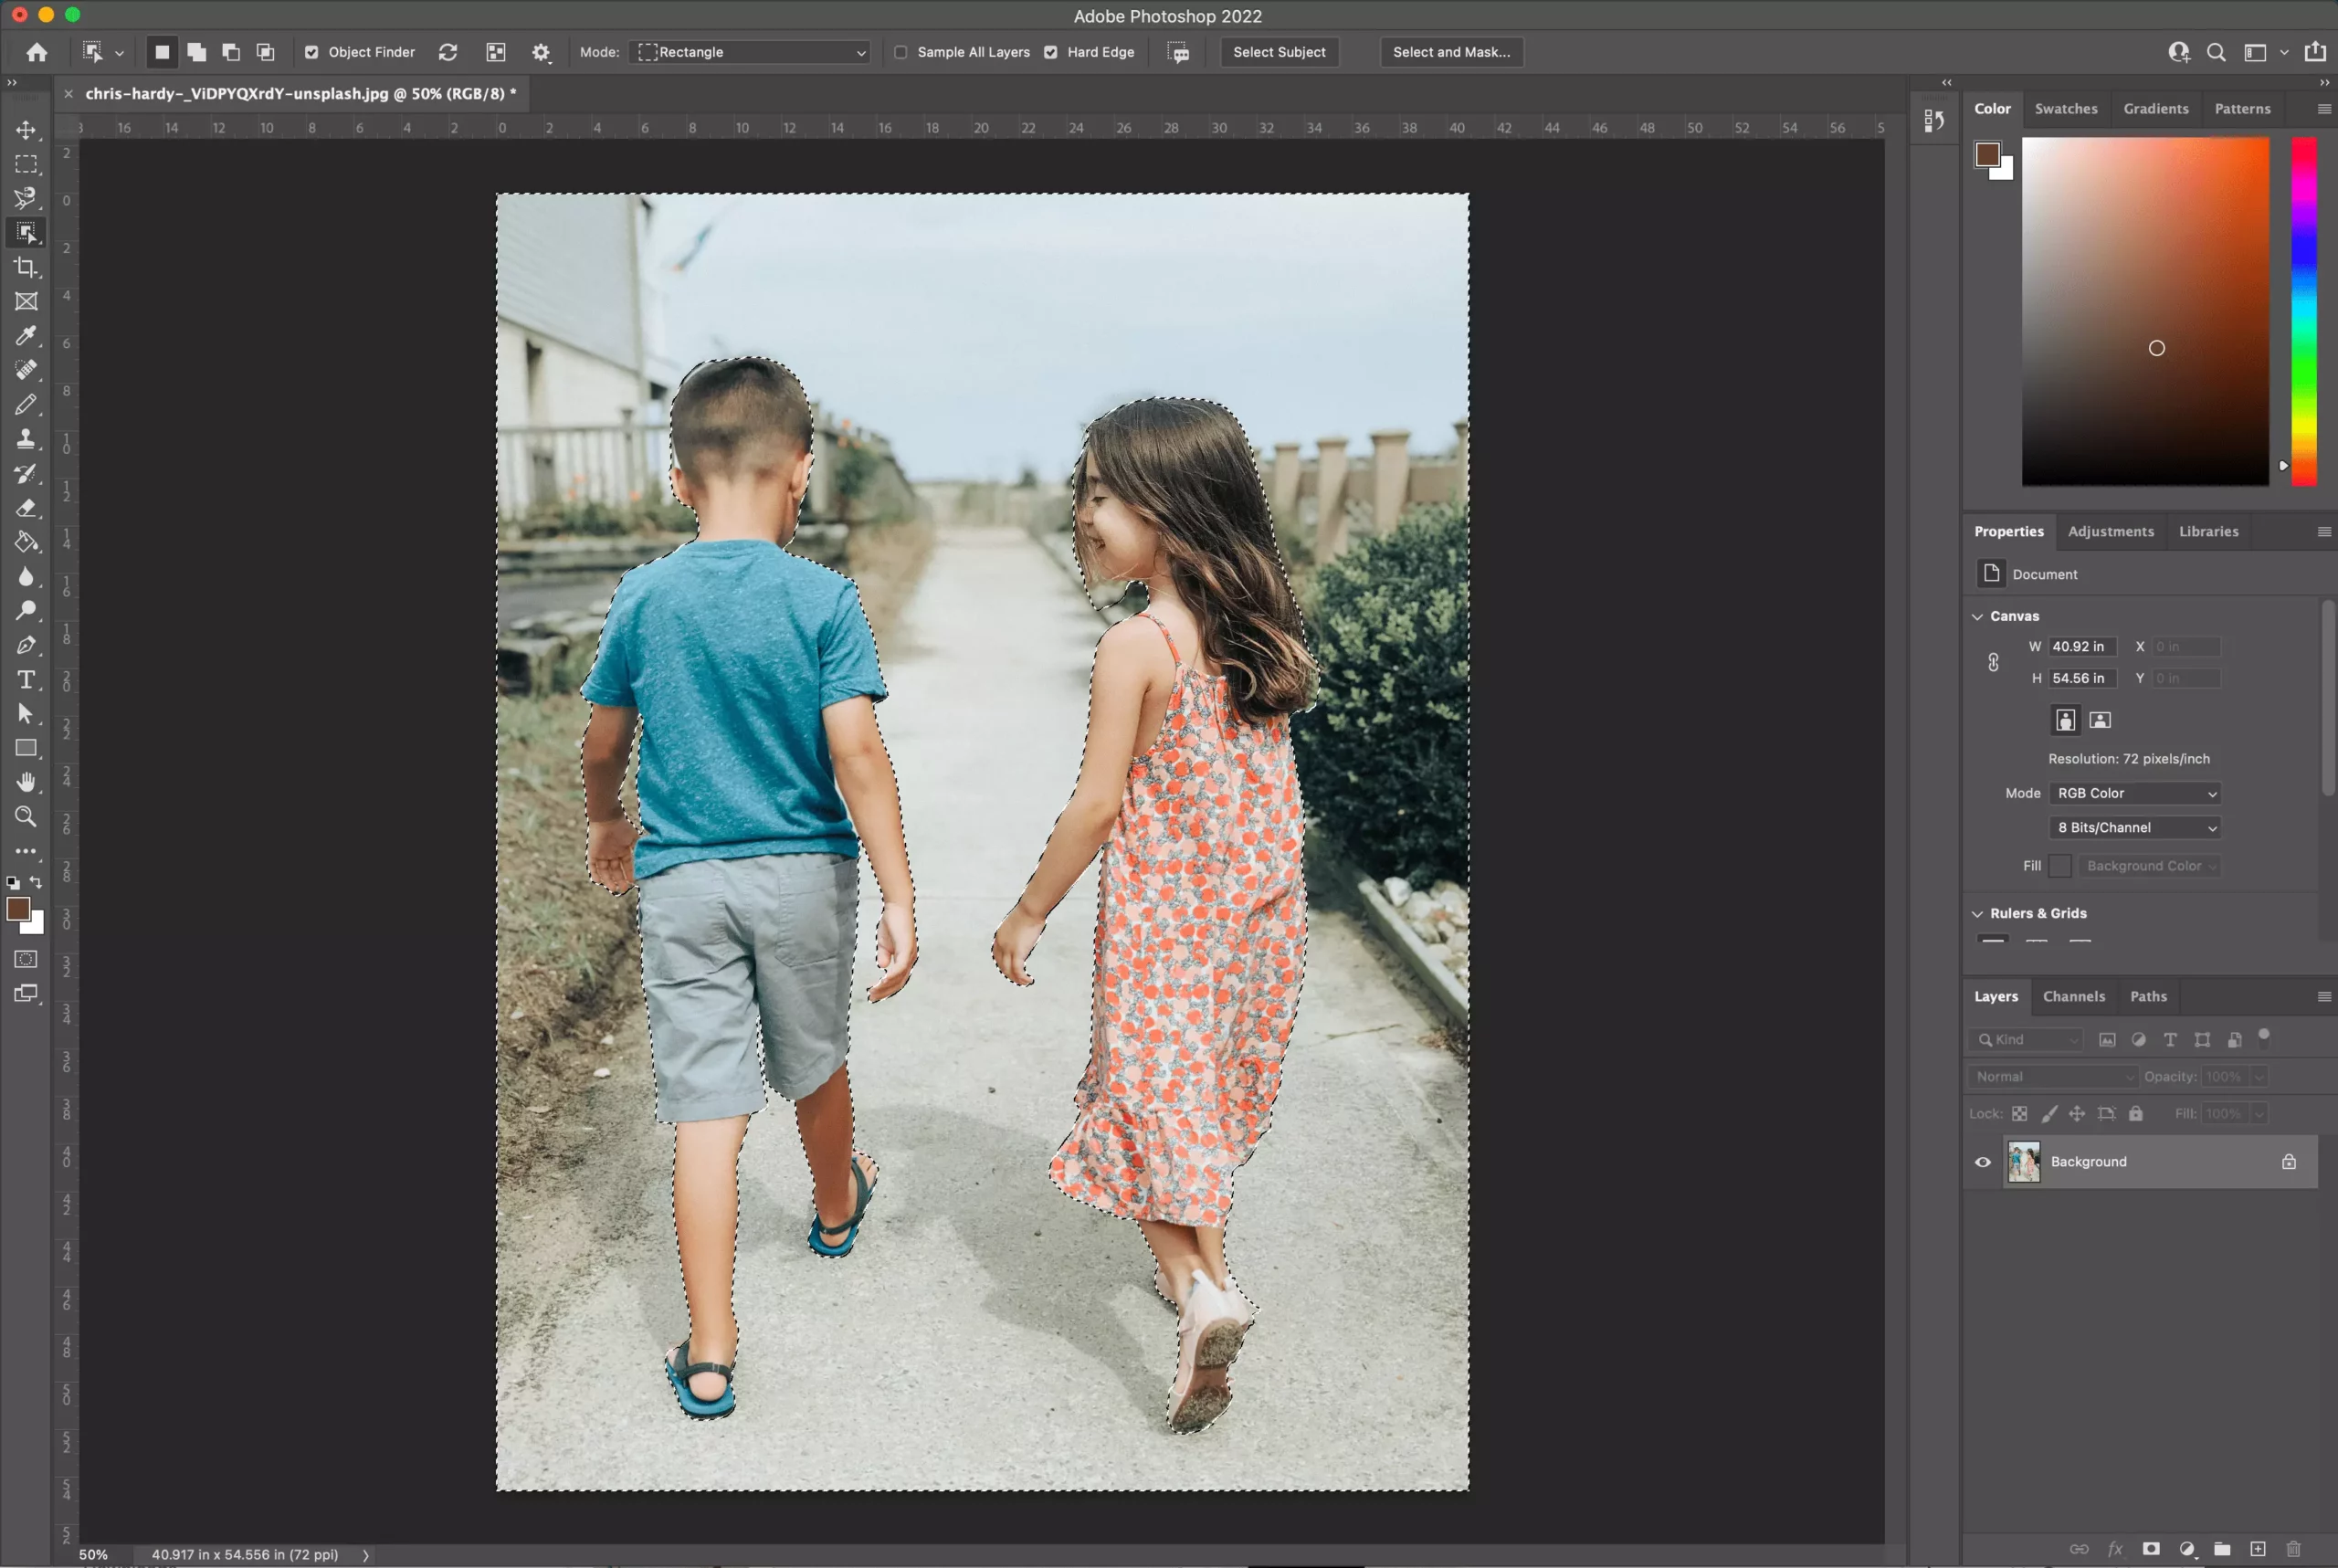
- Relying on what you need the background to be (in my case, I need it to be clear), you’ll doable should unlock your picture, so it’s not thought-about a background.
- Subsequent, click on on on the lock on the correct side of your picture’s layer to unlock it. The layer title will change to “Layer 0” you probably have no fully totally different layers. To take away the background, click on on on the Eraser Machine (guaranteeing your brush may be very giant) and begin erasing the background.
You don’t need to stress about Photoshop dropping the alternate options. Must you happen to ever should reselect your objects, choose the Object Choice instrument and hover over your objects as quickly as further.
It is doable you will uncover strategies to edit the next masks created by the Object Choice instrument (if it didn’t get every issue contained in the preliminary choice).
Picture credit score rating score: Chris Hardy on Unsplash
3. Take away Background in Photoshop with Fast Motion
This instrument is goo to make the most of if you want it quick, and as well as you’re not mainly in quest of perfection. It’s largest to make the most of with footage with excessive distinction between topic and background, and when the topic has pretty simplistic strains.
By far, the quickest methodology talked about correct proper right here is the built-in Photoshop Fast Motion for eradicating backgrounds in Photoshop. It was launched in Photoshop 2021 (contained in the Inventive Cloud subscription) and provides an Adobe background remover that’s atmosphere pleasant and straightforward to make the most of.
With tempo, nonetheless, comes loads a lot much less accuracy. Utilizing Photoshop Fast Motion will do a lot of the be merely greatest for you, nonetheless the outcomes may fall wanting your expectations, relying in your picture. If that’s the case, it’s essential to use any strategies described correct proper right here to shine up the consequence.
Fast Motion Steps
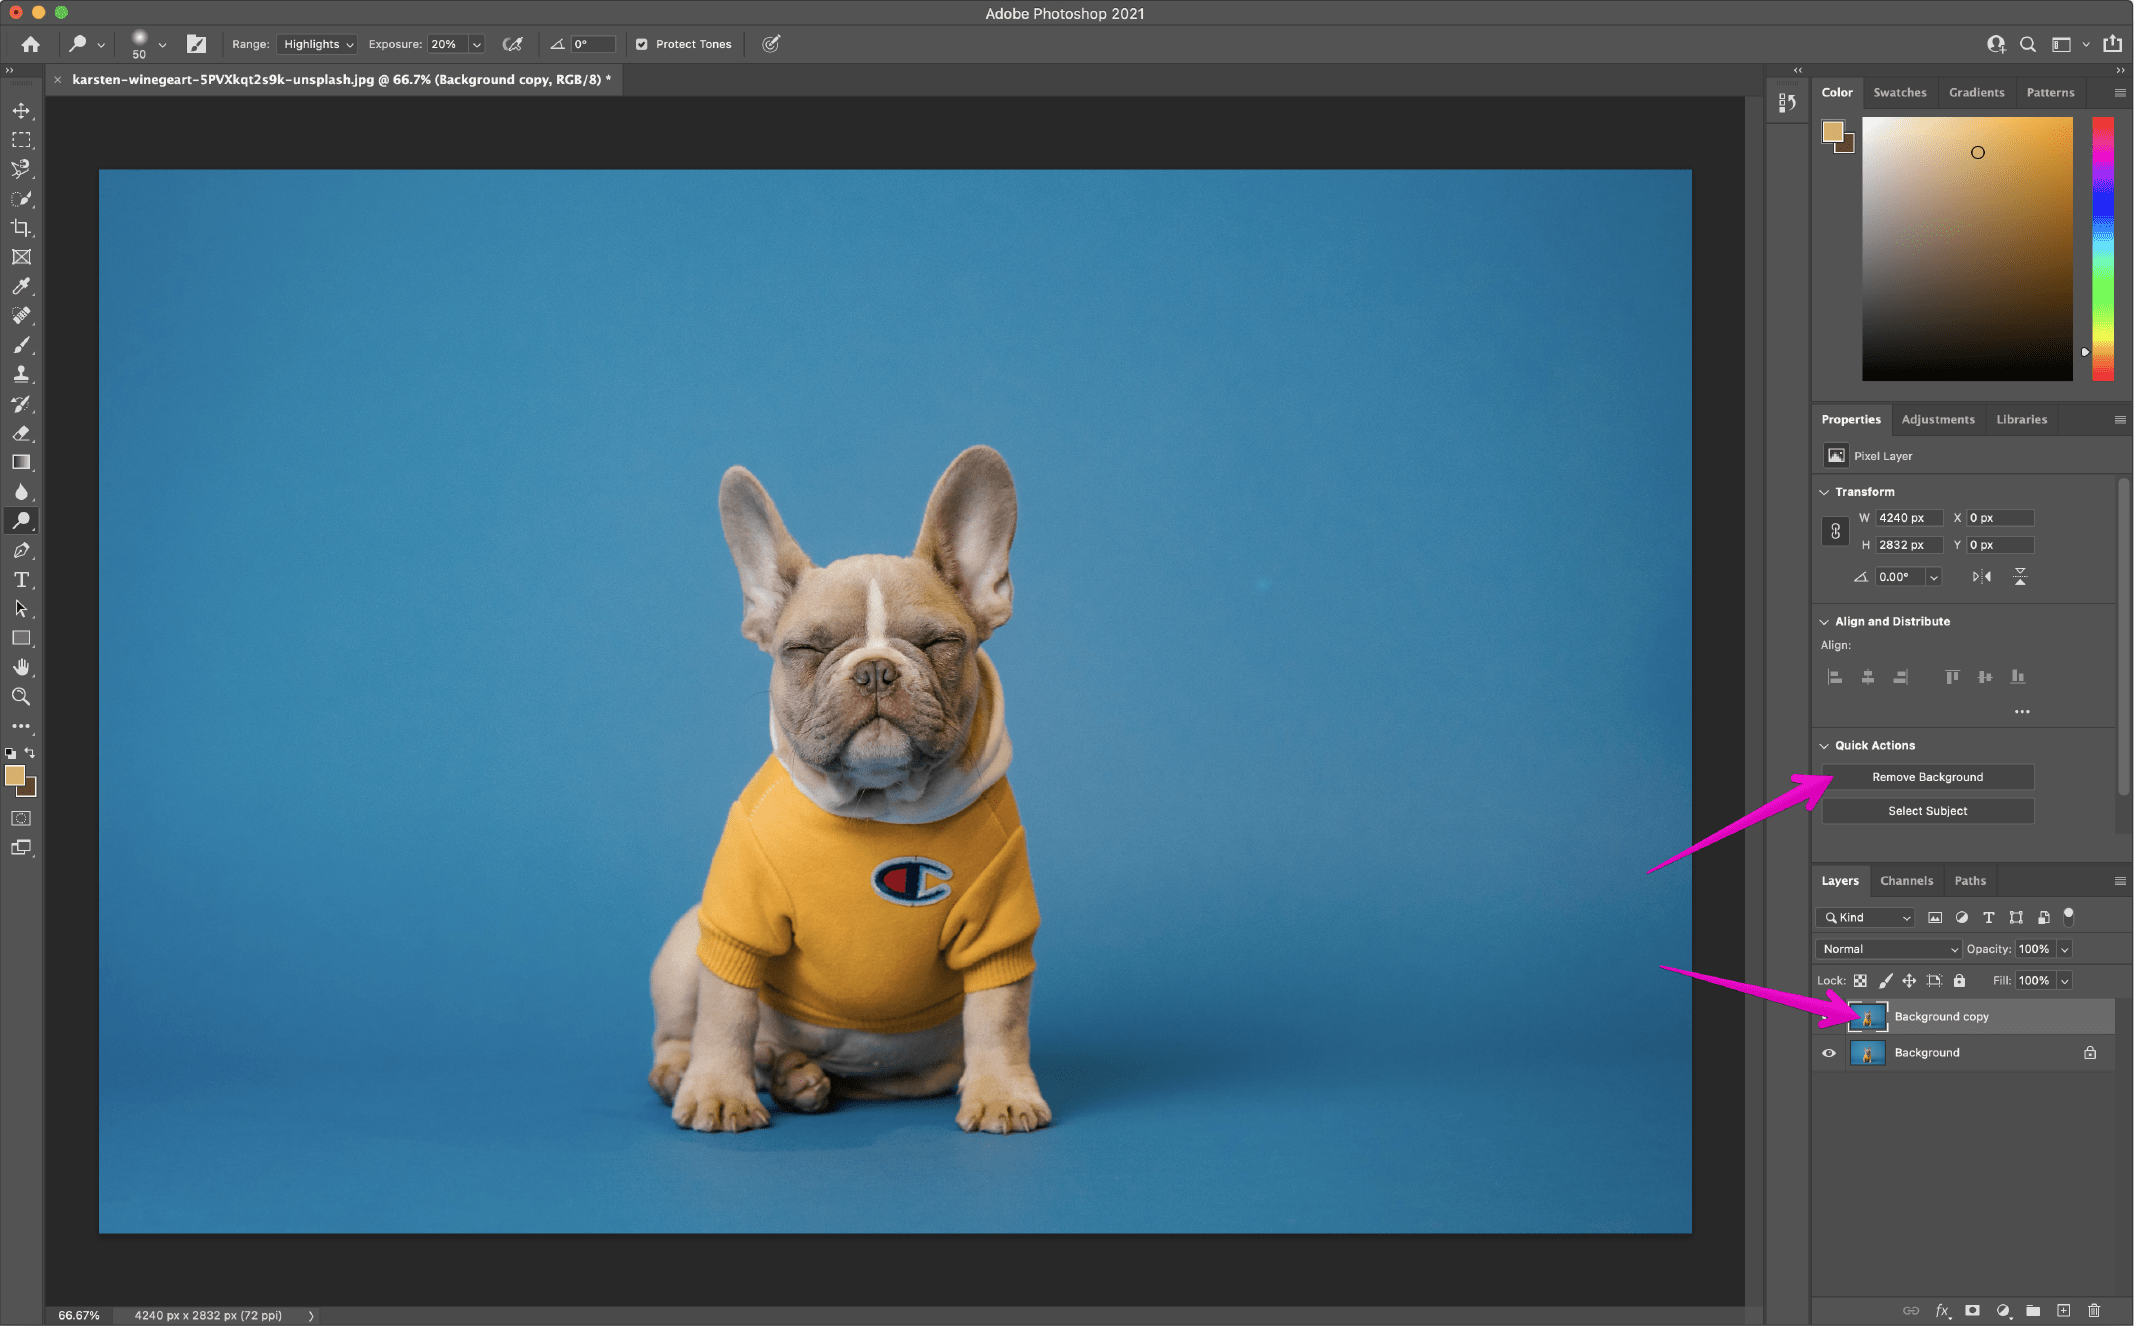
- Collectively alongside along with your picture open in Photoshop, appropriate click on on in your Background layer and click on on on Duplicate Layer. All through the dialog space that pops up, title your layer (calling it no matter you want) and click on on on OK. Click on on on the attention icon to the left of the distinctive layer to point that layer off.
- Be sure your Properties panel is open by going to Window > Properties. (If it was already checked, there’s no should click on on on it; if it isn’t checked, click on on on it to open it up on the right-hand side by default.)
- In your Layers panel, click on on in your new layer. All through the Properties panel (by default this must be above your Layers panel), click on on on the Take away Background button beneath Fast Motion.
- The fast motion has now eradicated the background, leaving your layer with a masks all through the topic.
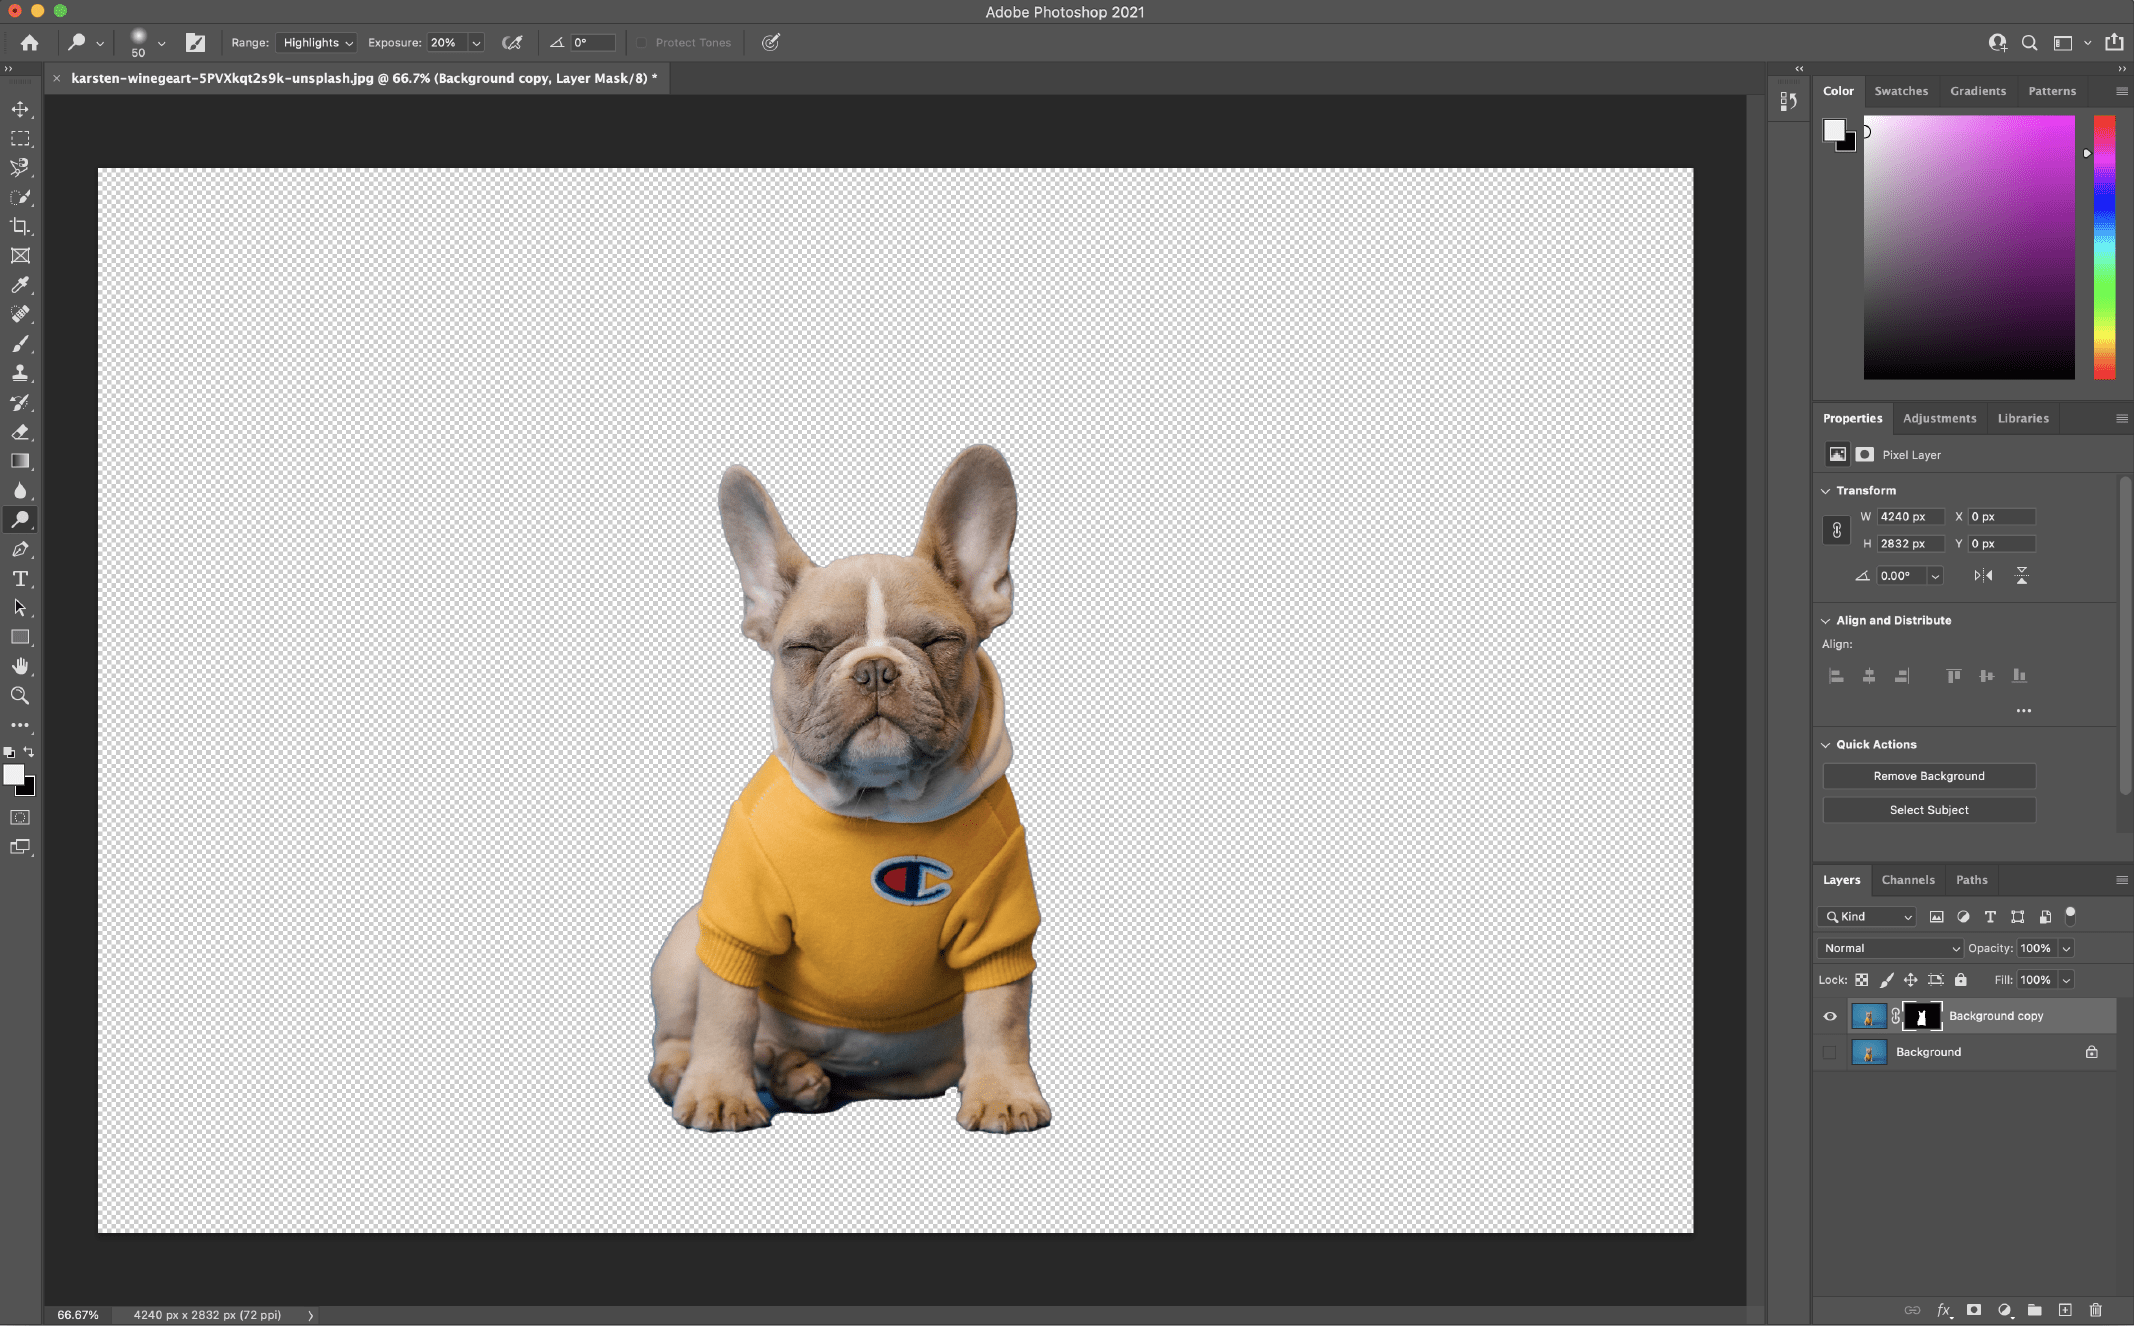
From correct proper right here, it is doable you will make refinements by going into the masks and adjusting as wanted (akin to all through the canine’s ft on the underside left of the picture). Whereas open air the scope of this textual content material, throughout the event you need assist with working with masks, take a look at this Adobe tutorial.
Picture credit score rating score: Karsten Wingert on Unsplash
This instrument is sweet to make the most of when working with excessive distinction footage, though it takes an excellent little little bit of effort and time to supply an excellent consequence.
The Background Eraser instrument is great throughout the event you want further administration over eradicating a background in Photoshop nonetheless nonetheless need Photoshop to do only a few of the heavy lifting for you. For added administration, you’ll ought to sacrifice a while to get the specified consequence. Relying in your {{photograph}}, utilizing the Background Eraser instrument is prone to be terribly atmosphere pleasant and a time saver and get you nearer to your required consequence with a while concerned.
Background Eraser Machine Steps
- Collectively alongside along with your picture open in Photoshop, appropriate click on on in your Background layer and click on on on Duplicate Layer. All through the dialog space that pops up, title your layer (calling it no matter you want), and click on on on OK. Click on on on the attention icon to the left of the distinctive layer to point that layer off.
- Choose the Background Eraser instrument from the toolbox on the left-hand side. This instrument could also be hidden under the Eraser instrument. Click on on on and protect the Eraser instrument to disclose further picks to and choose the Background Eraser instrument.
- All through the instrument picks bar on the prime of the present, click on on on the comb icon to disclose the comb panel.
Change the hardness in order that it’s close to or at 100%.
The dimensions is prone to be no matter you deem related for the picture you’re working with. On this case, I’m beginning with 50px.
It is doable you will alter it as we endure the utilization of the sq. brackets ([ and ]) to lower and enhance the size of the comb.
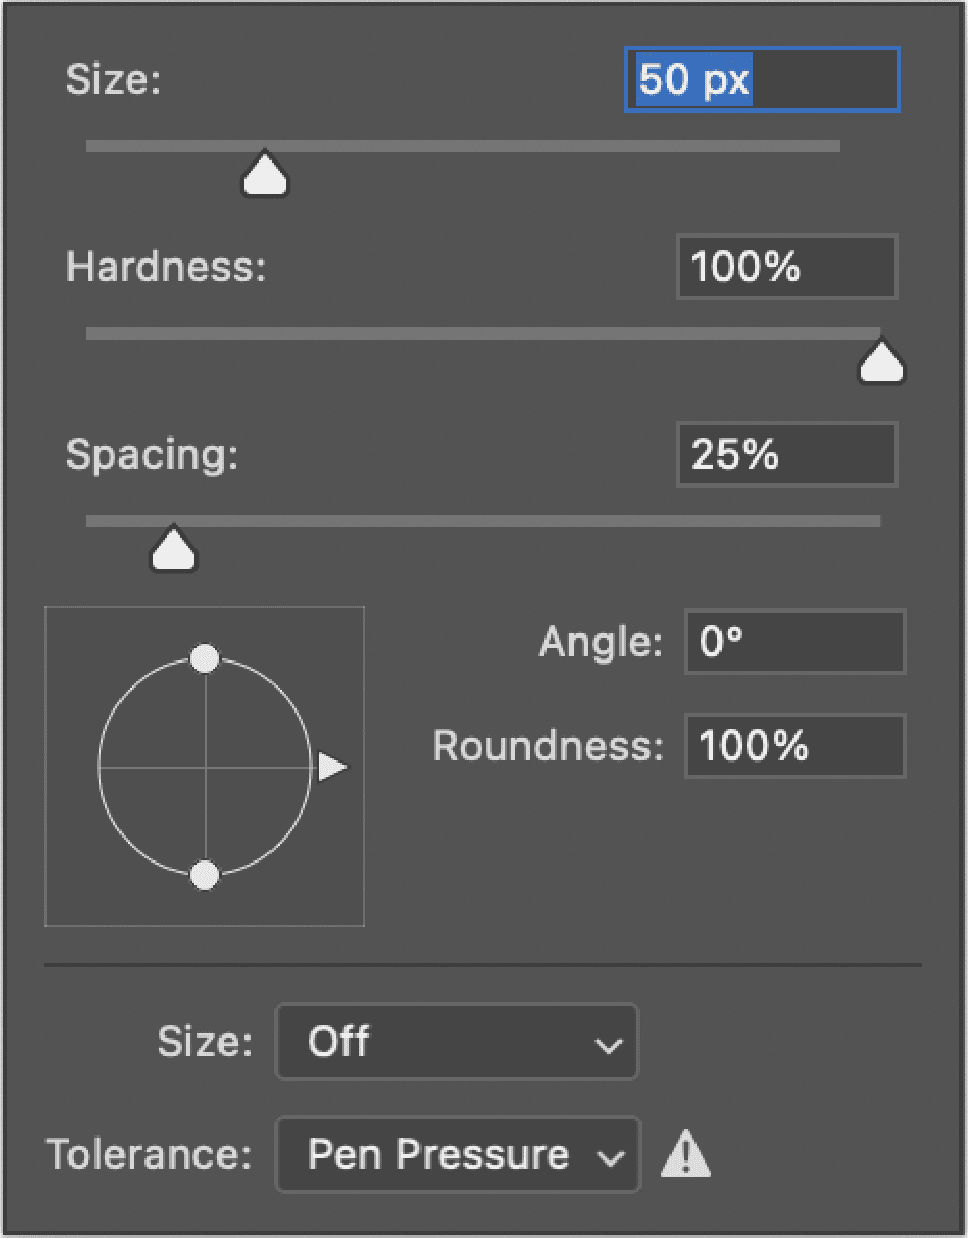
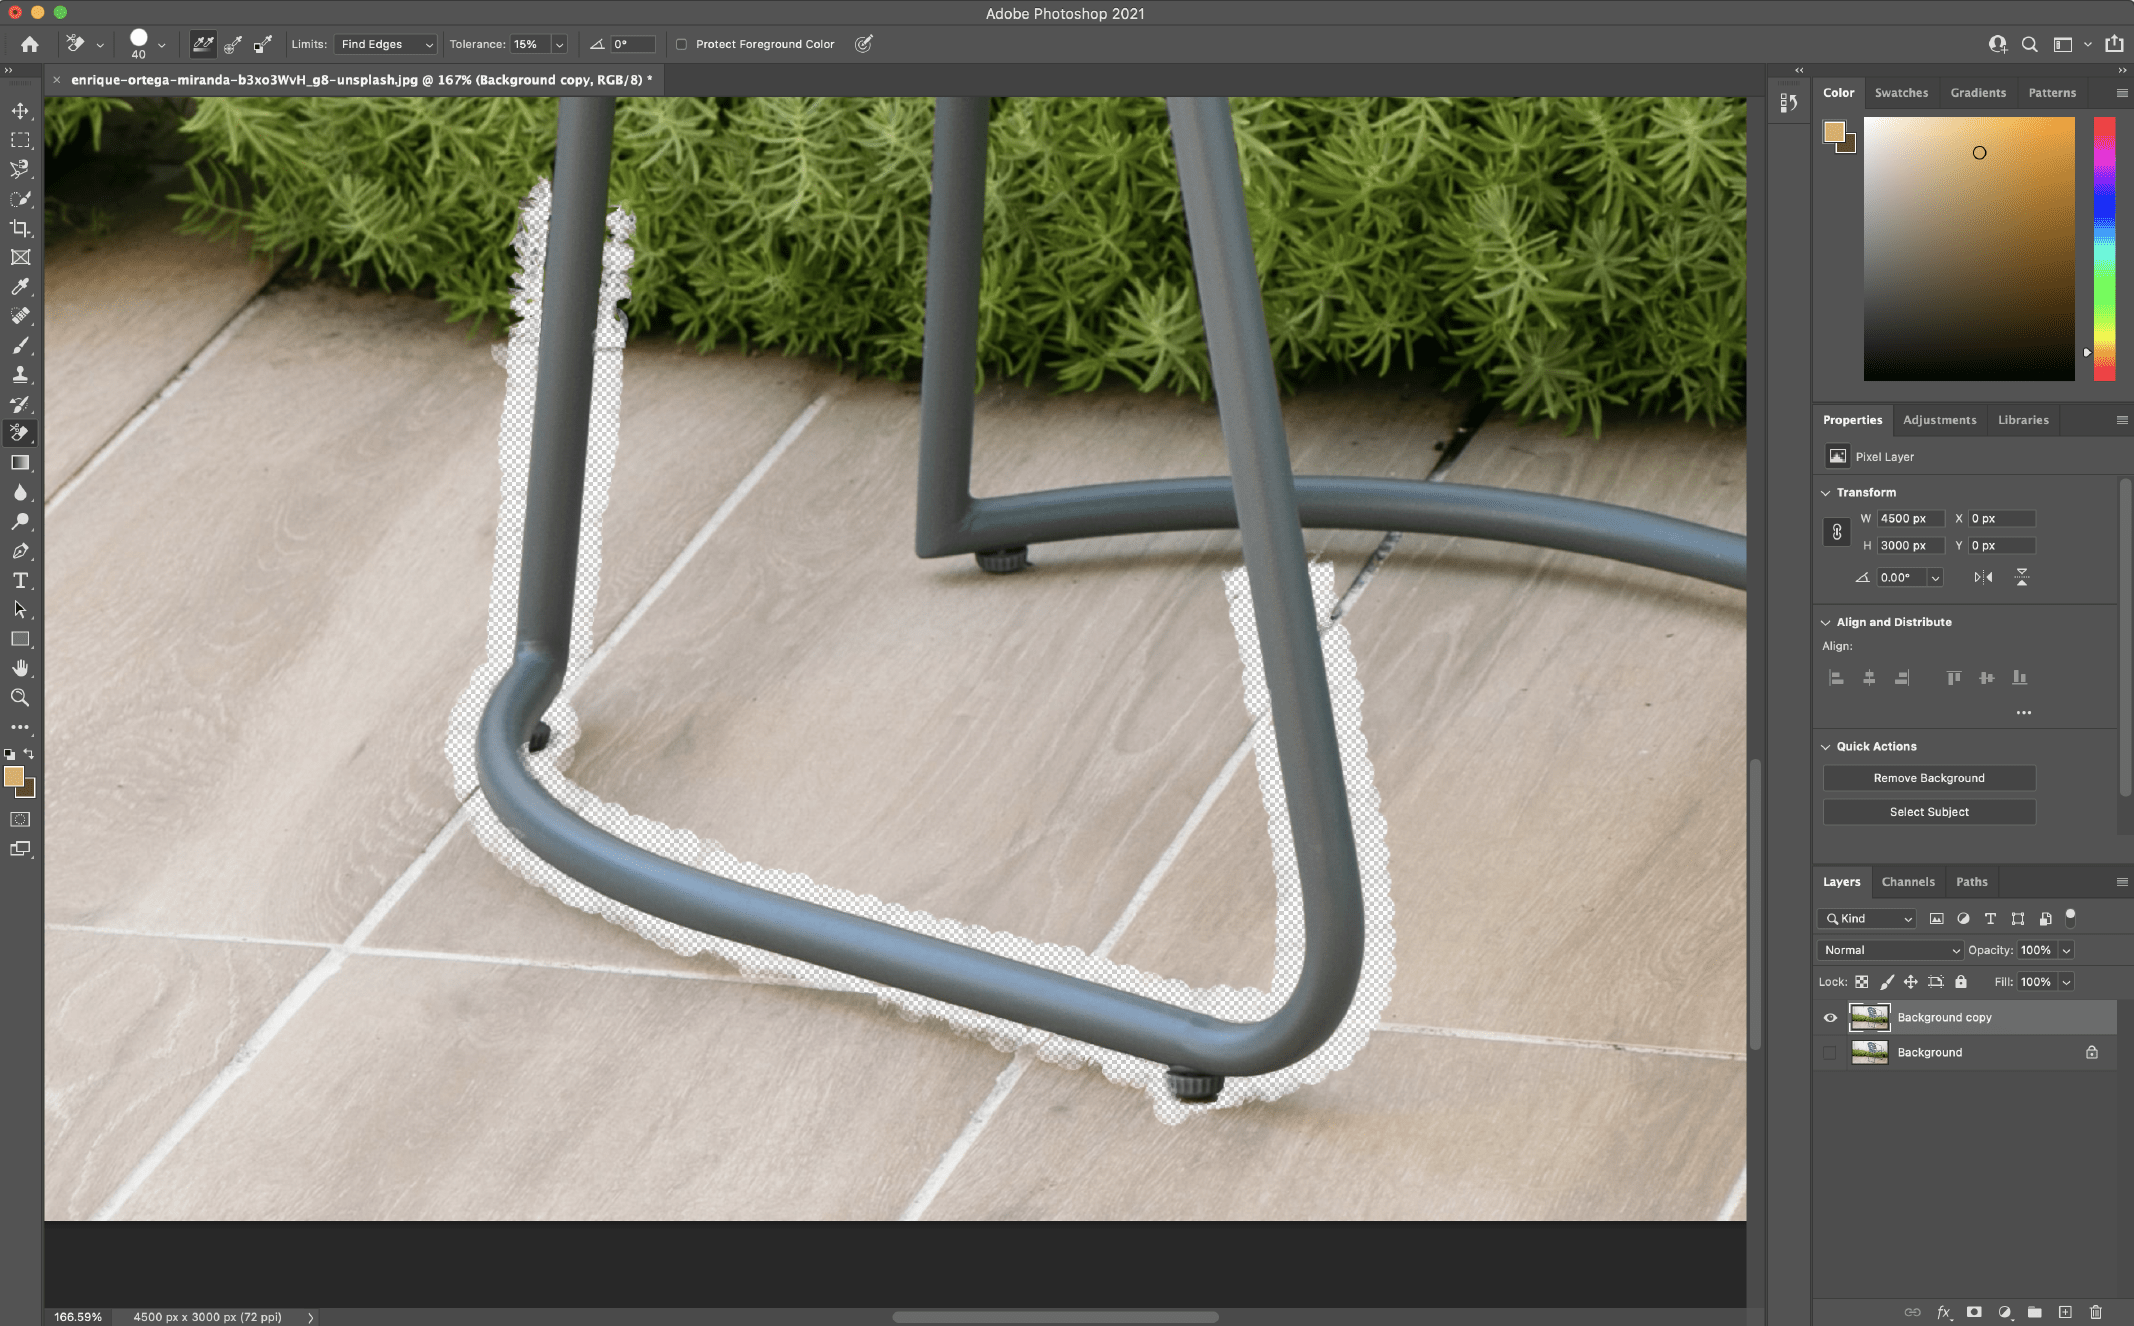
- Nonetheless contained in the instrument picks bar on the prime, set the Sampling to be Common. It’s the primary of three icons after the comb measurement choice. Subsequent, set the Limits to Uncover Edges and the Tolerance to be someplace contained in the fluctuate of 20–25%.
Observe that the decrease the tolerance, the a lot much less coloration variations it’ll determine on up. Conversely, the upper the tolerance, the extra colours the instrument will choose.

- Begin erasing the background spherical your topic utilizing the Background Eraser instrument by clicking and holding whereas shifting the comb. The intention correct proper right here is to handle the crosshairs contained throughout the instrument from touching your topic. Zoom in on the picture if it will be significant see further shut particulars.
I want to recommend you do transient strokes with the comb (remembering to let go of the mouse on occasion) so as that you would be able to frequently Undo if the comb goes too far.
All through the tougher areas, you may uncover that it will be significant alter the size of your brush as you go. You’ll do this by revisiting the units choice bar on the prime, or utilizing [ and ] to manage down and up the size of your brush.
If resizing the comb doesn’t work and it’s erasing your topic, first undo your motion. After that, go into the instrument picks bar on the prime and alter the Sampling to As shortly as (the center icon contained in the set of three), the Limits to Discontiguous, and Tolerance to spherical 10%. On account of these settings, the comb will solely use the colour beneath the crosshairs in that second and on no account resample as you go alongside.
Whereas this course of is prone to be fast or tedious relying in your picture, it provides good consequence. You’re in control of figuring out what the topic is and what isn’t. If this doesn’t full the job, fully totally different strategies talked about correct proper right here may help you get nearer to your required consequence.
Try this Adobe tutorial for extra detailed info on the Background Eraser instrument.
Picture credit score rating score: Enrique Ortega Miranda on Unsplash
This instrument is sweet to make the most of when the topic and background are usually not terribly contrasted or when fully totally different units such on account of the Fast Motion or Background Eraser instrument talked about above aren’t producing desired outcomes. It provides you mainly primarily probably the most administration out of the whole strategies listed here.
The Pen instrument is probably among the tried and true methods to take away backgrounds from footage in Photoshop. It provides you mainly primarily probably the most administration over the tip finish consequence. Nonetheless, on account of it provides you mainly primarily probably the most administration, it might be mainly primarily probably the most time-consuming. The Pen instrument requires endurance.
Pen Machine Steps
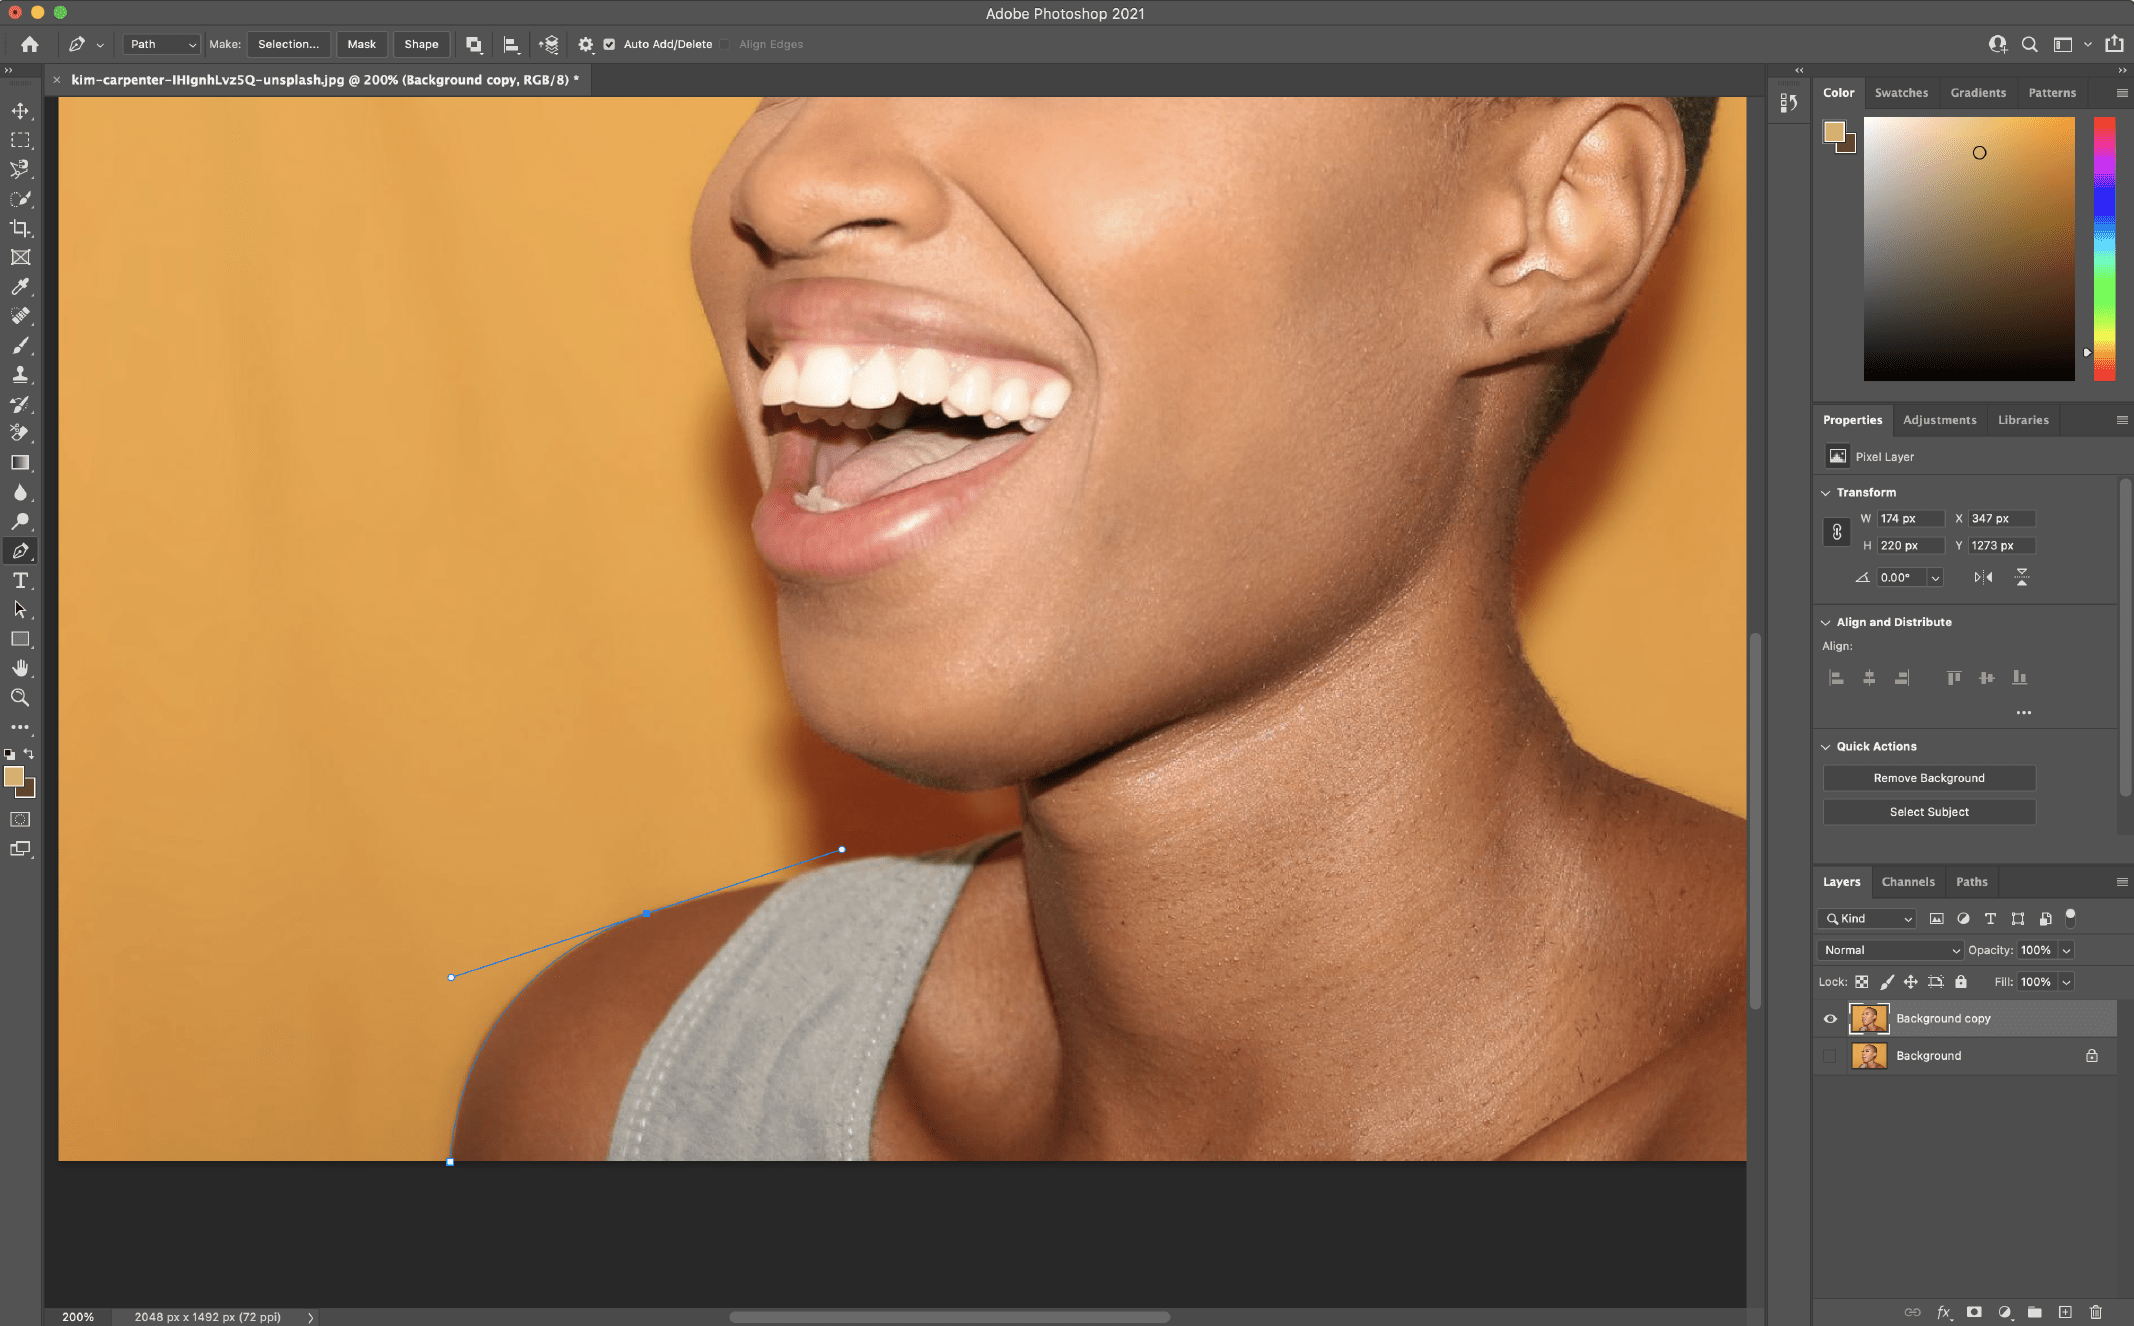
- Collectively alongside along with your picture open in Photoshop, appropriate click on on in your Background layer and click on on on Duplicate Layer. All through the dialog space that pops up, title your layer (no matter you’d like), and click on on on OK. Click on on on the attention icon to the left of the distinctive layer to point that layer off.
- Choose the Pen instrument from the toolbox on the left-hand side (above the Textual content material materials instrument). Zoom in to an space of your picture to begin. Begin on the perimeter of your topic (or an applicable start line) and click on on on to begin the primary anchor. Then begin working your approach spherical your topic, along with further anchors to begin outlining your topic.
If it will be significant make a curved line, click-hold-drag to supply a curved line, shifting the mouse to manage the curve as wanted.
To handle an anchor diploma or directional strains for advantageous tuning, use the Direct Choice instrument (hidden beneath the Path Choice instrument) contained in the toolbox.
To undo an anchor, go to File > Undo or use your keyboard shortcut (Command + Z for macOS, Administration + Z for Home residence home windows).
For further data concerning the Pen instrument and dealing with paths in Photoshop, research this Adobe tutorial.
- Be sure to full the trail when you’re accomplished by assembly up alongside alongside along with your first diploma. When you’ve accomplished the trail and as well as you’re happy with the outcomes, you’ll need to save the trail. Go to Window > Paths to disclose the Paths panel (it must look on the right-hand side by default). Click on on on the three bar menu on the proper and click on on on New Path, and title your path. Now your path is saved contained in the Paths panel.
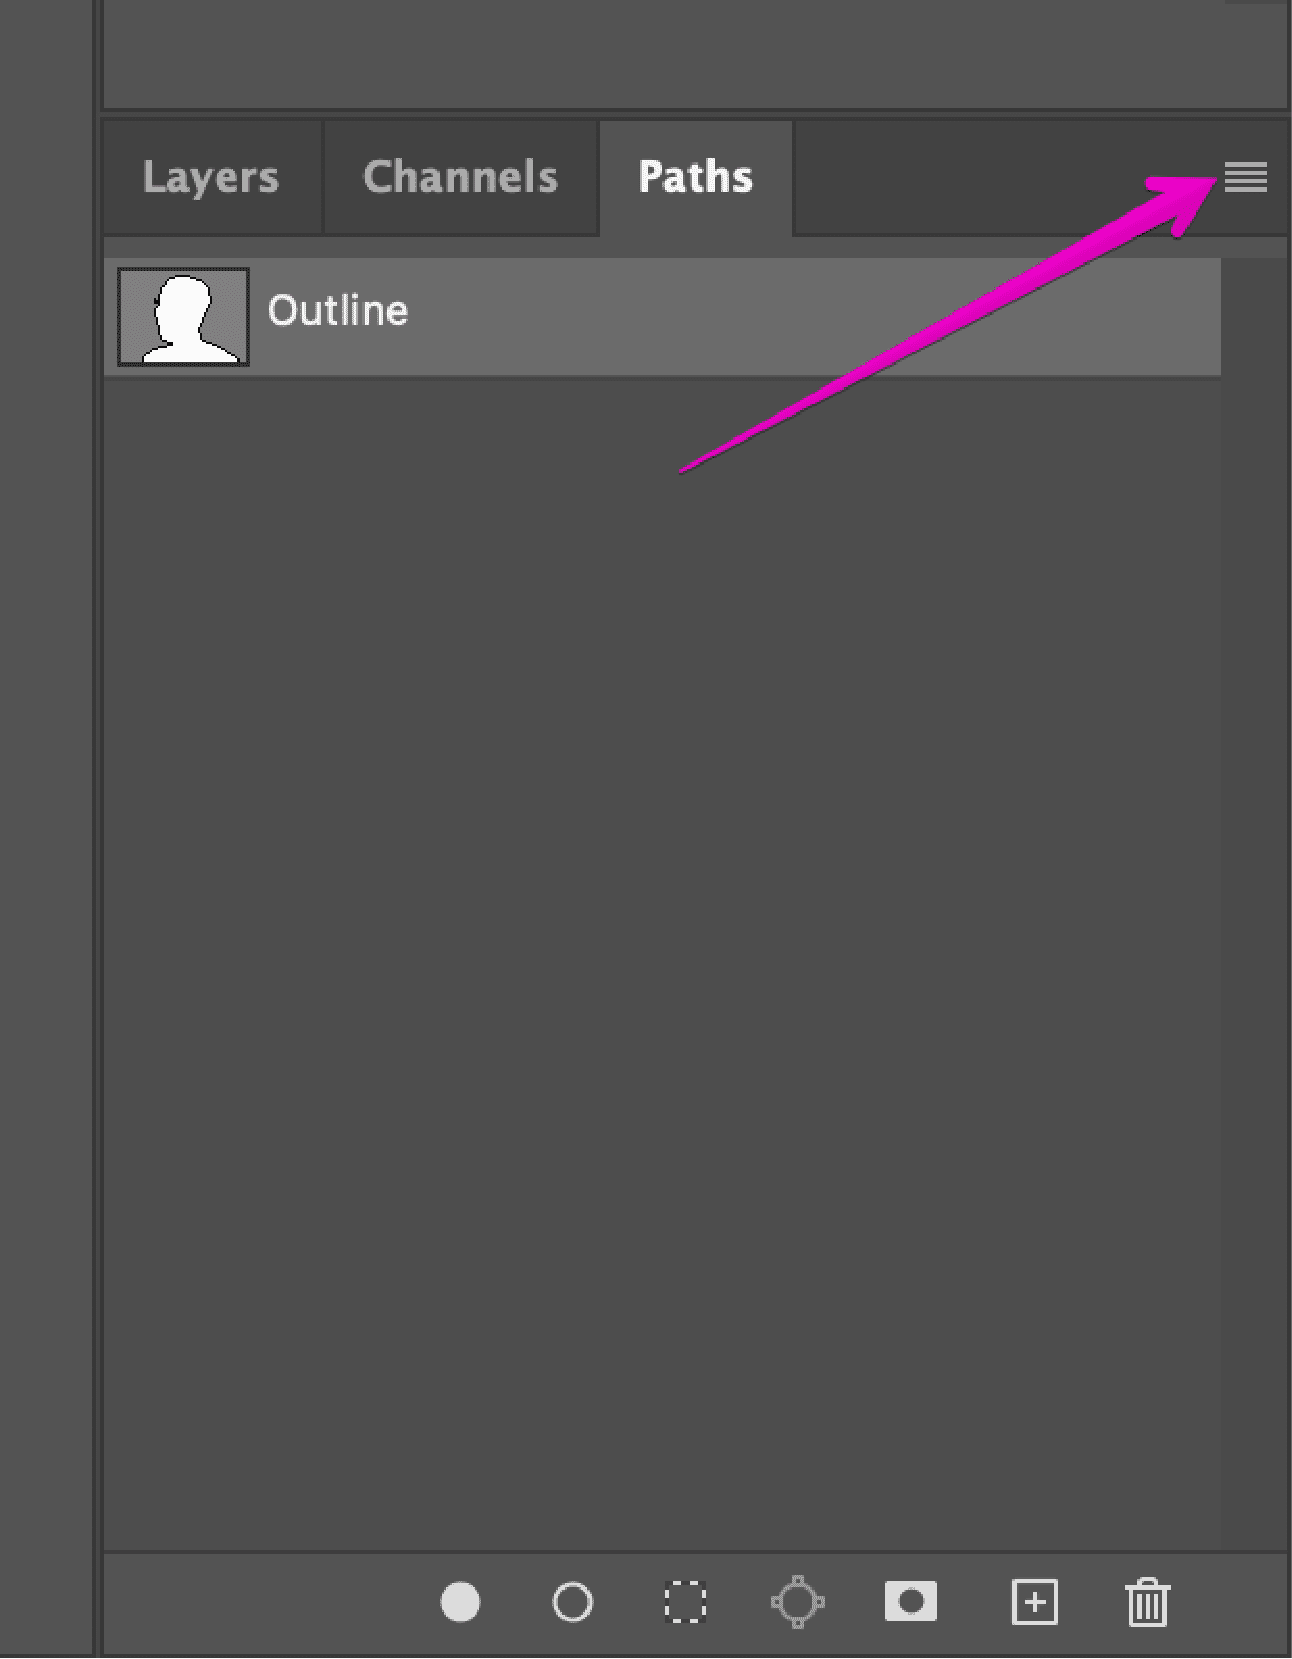
- Subsequent, appropriate click on on in your new path contained in the Paths panel and choose Make Choice, then click on on on OK contained in the dialog space (go away all defaults for now). This provides you the marching ants define the place your path was.
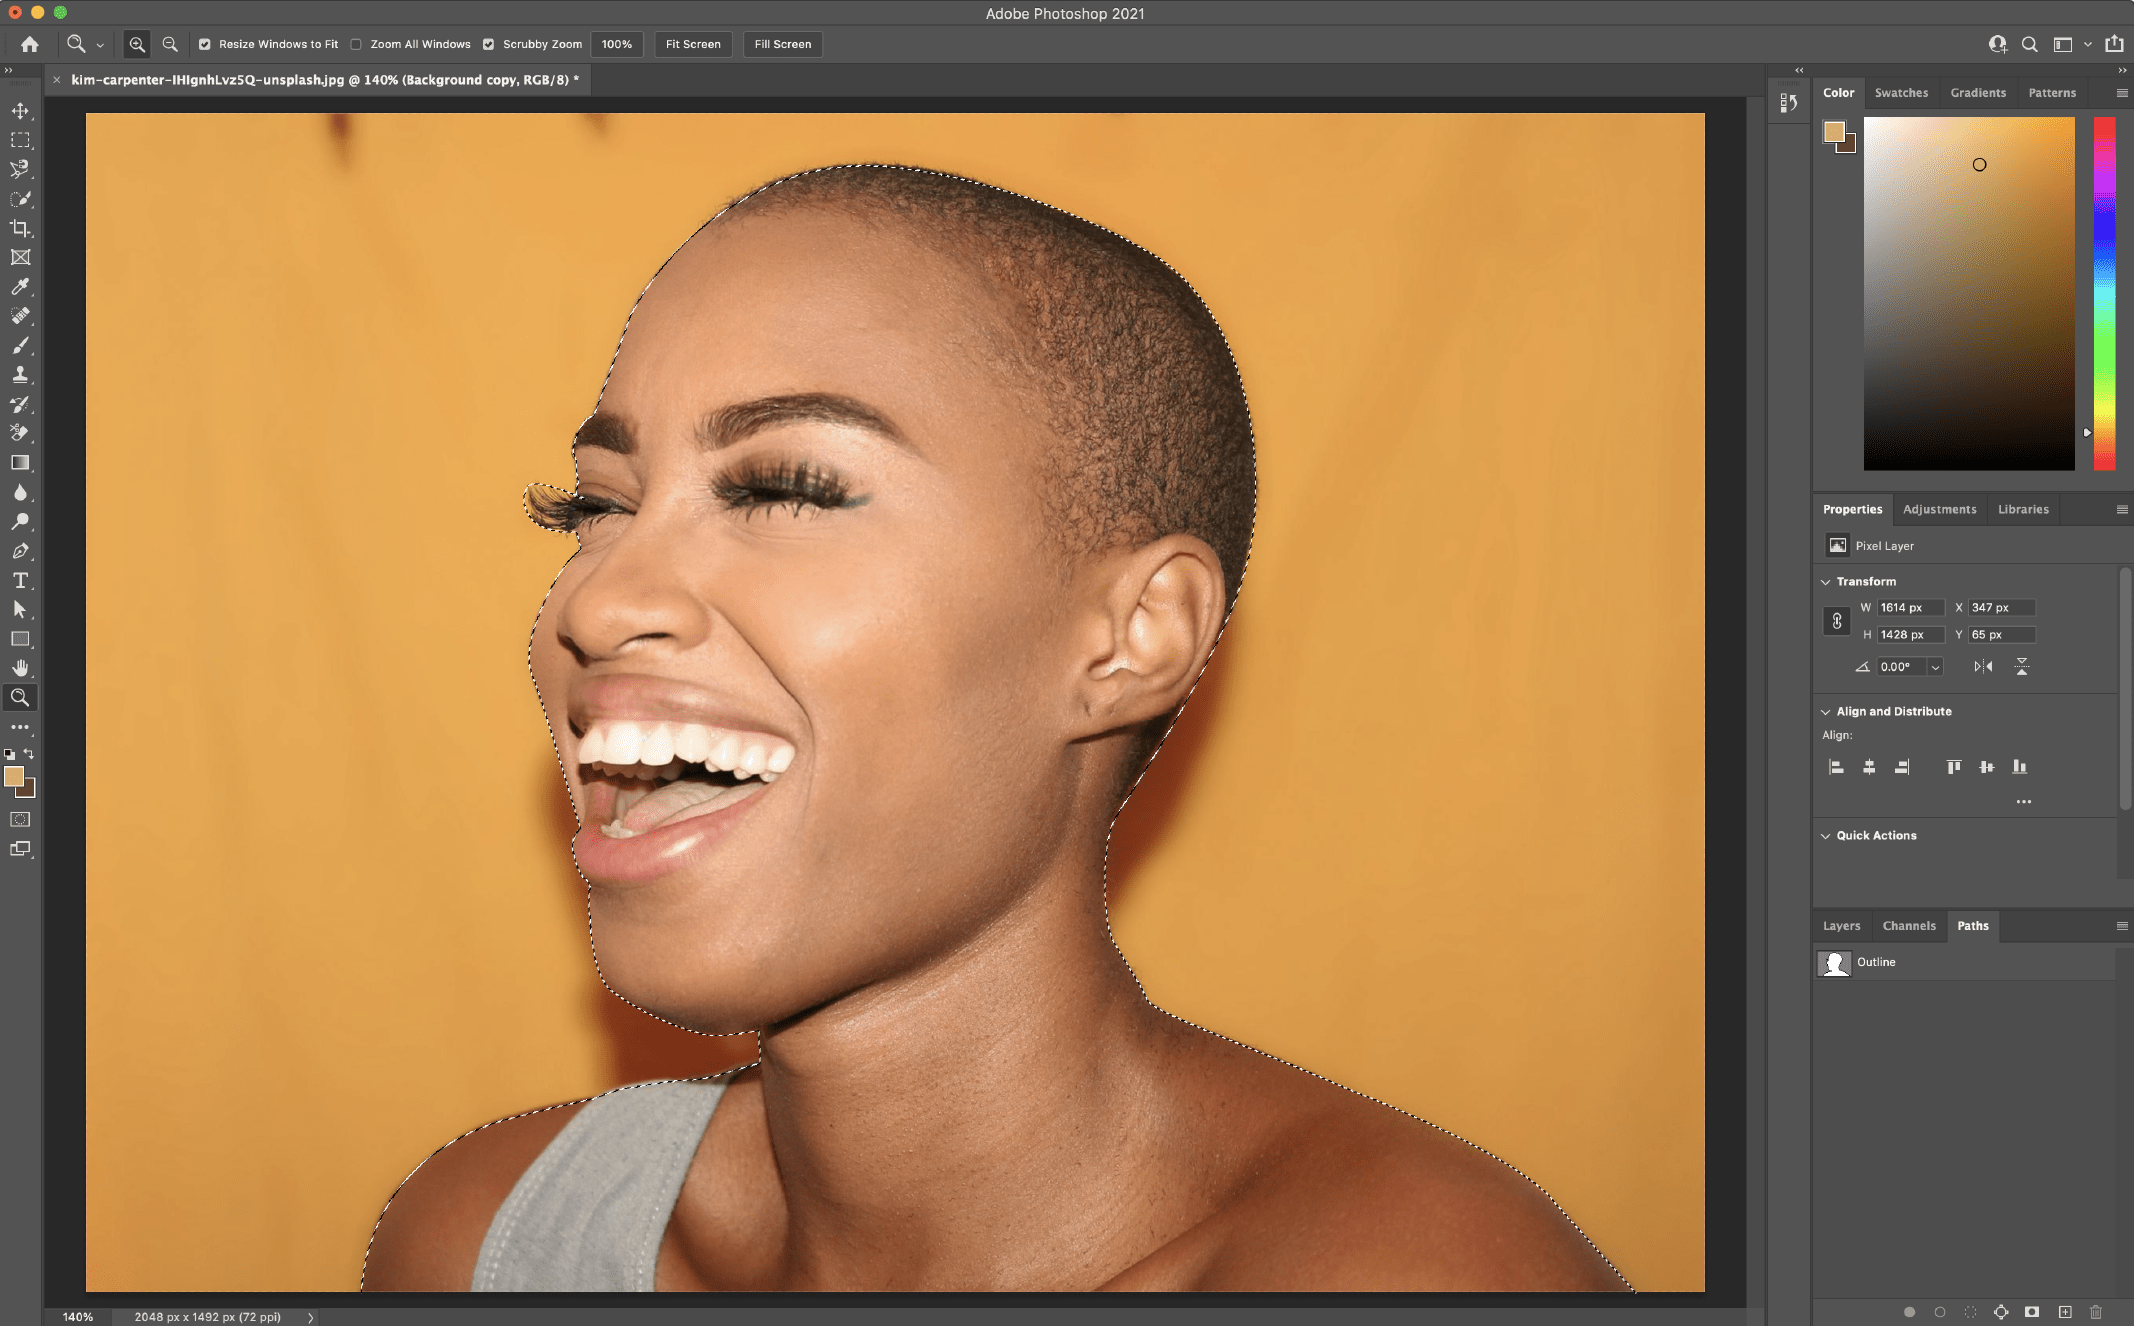
- Since we don’t need to delete what’s inside the choice, we’ll need to change the choice to be every issue along with the topic. Go to Choose > Inverse. You’ll see the marching ants in the intervening time are all through the whole picture and the topic, primarily deciding on the background.
- To delete the background, press Delete. You can now see the white/grey checkered background instead of your earlier background.
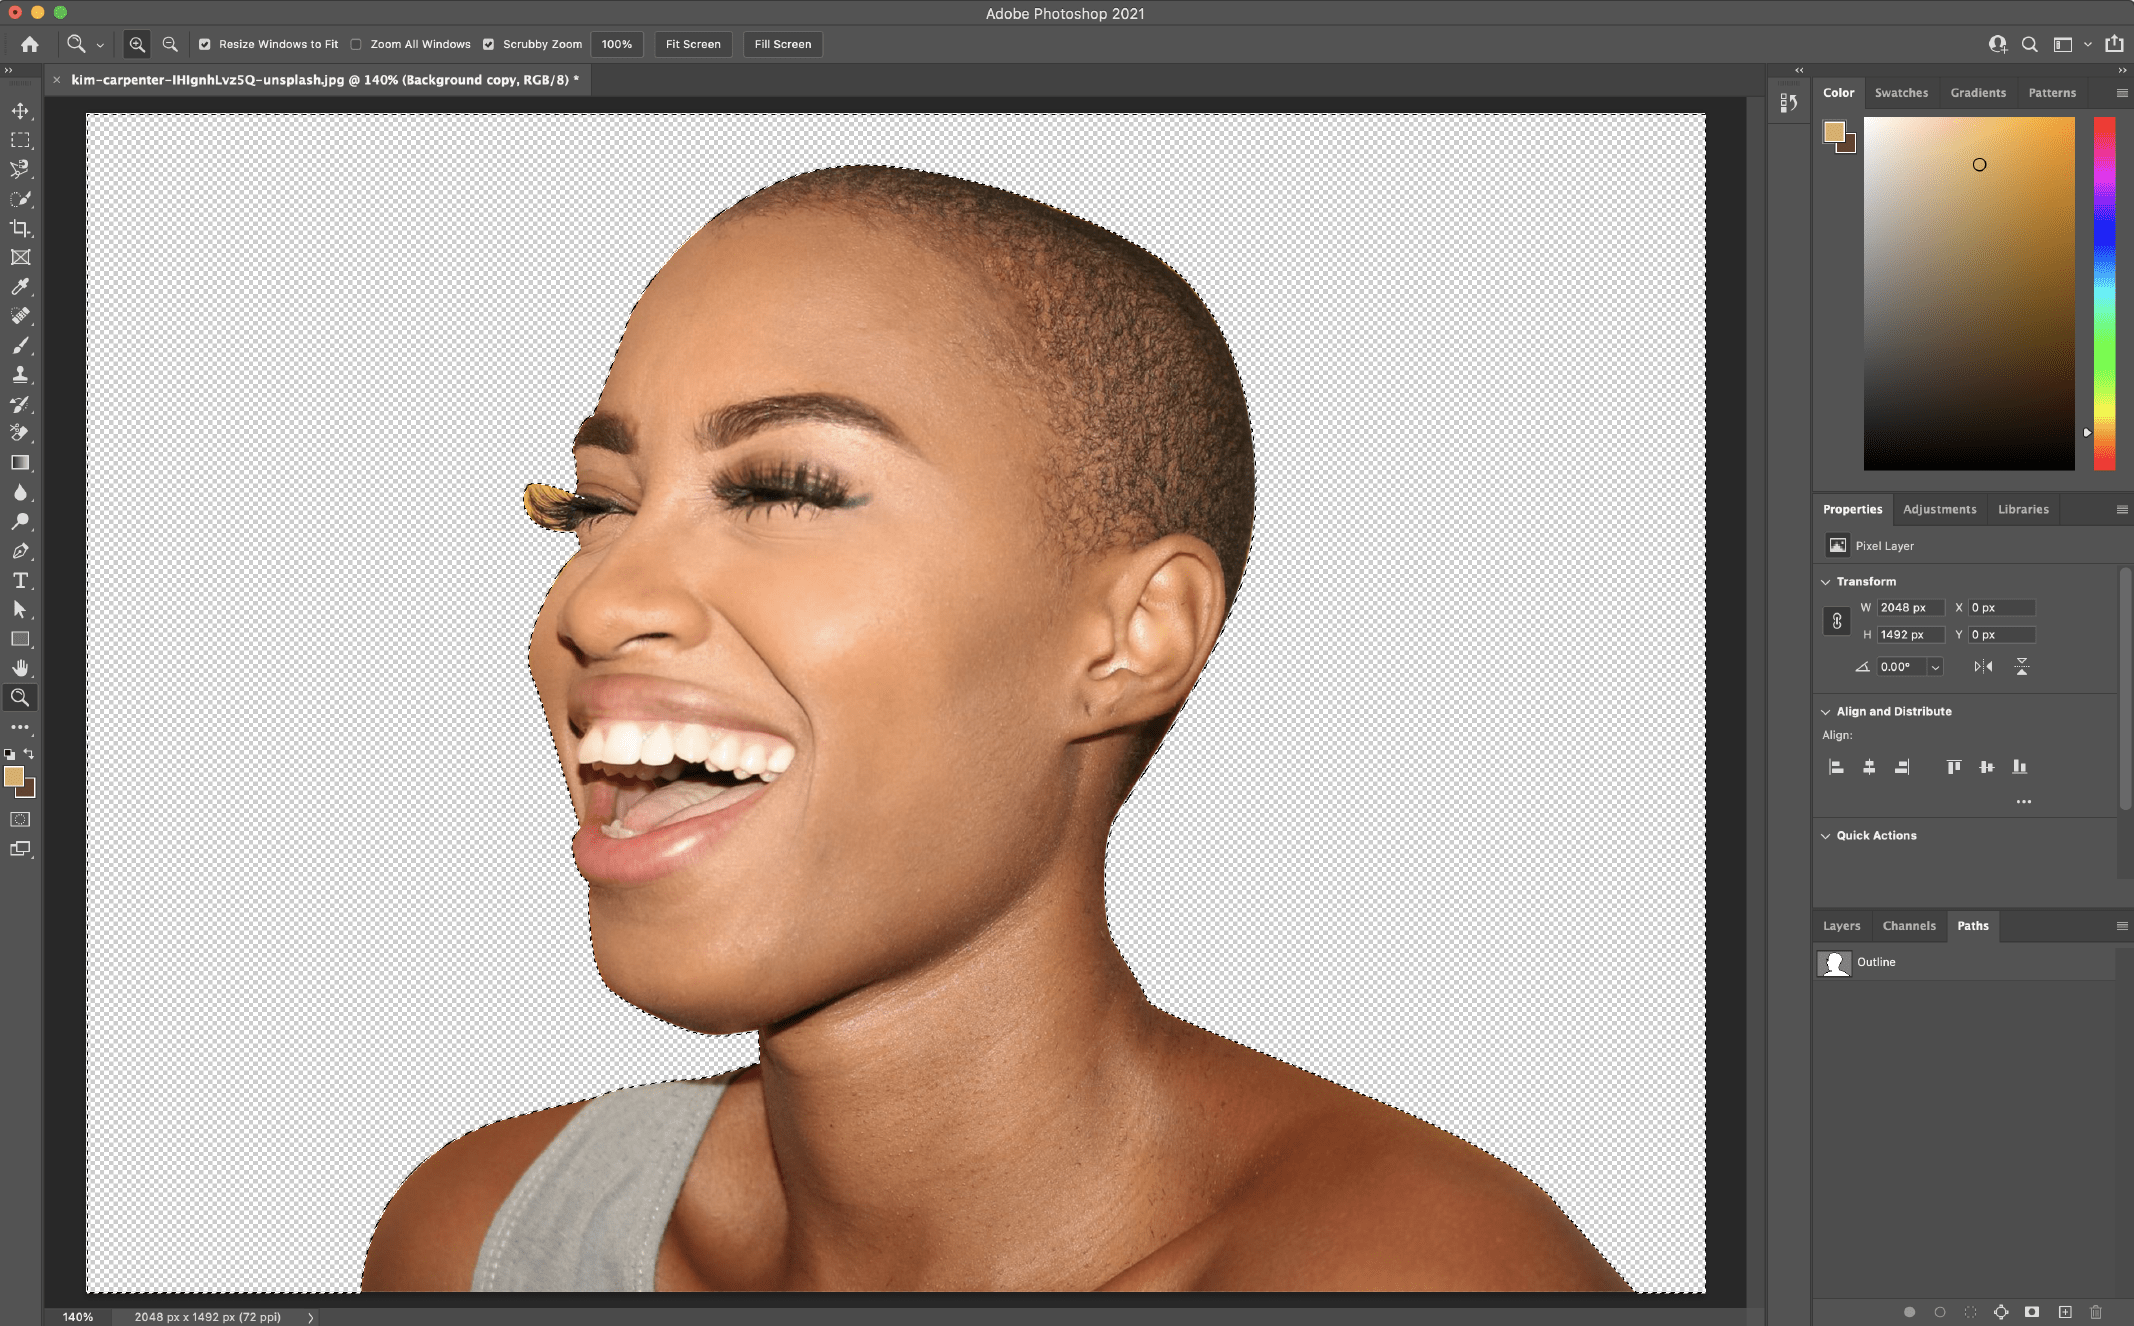
As with the opposite strategies listed, you may uncover that this doesn’t get you to 100%. Utilizing a mixture of the Pen instrument and fully totally different strategies correct proper right here will help you get nearer to your required consequence. (For example, I’d use a novel methodology to assist refine the lady’s eyelash space on this specific {{photograph}}.)
For added detailed info on the Pen instrument, take a look at this Adobe tutorial.
Picture credit score rating score: Kim Carpenter on Unsplash
This instrument is sweet to make the most of when the topic is generally excessive contrasted from the background and with tough edges, and the place you need to save time and have Photoshop detect the trail for you.
If the Pen instrument is simply too labor-intensive, in every other case you don’t need to take the time to attract out your topic, the Magnetic Lasso instrument could also be an excellent start line for shortly getting you the place it will be significant be so it is doable you will spend your time refining the small print.
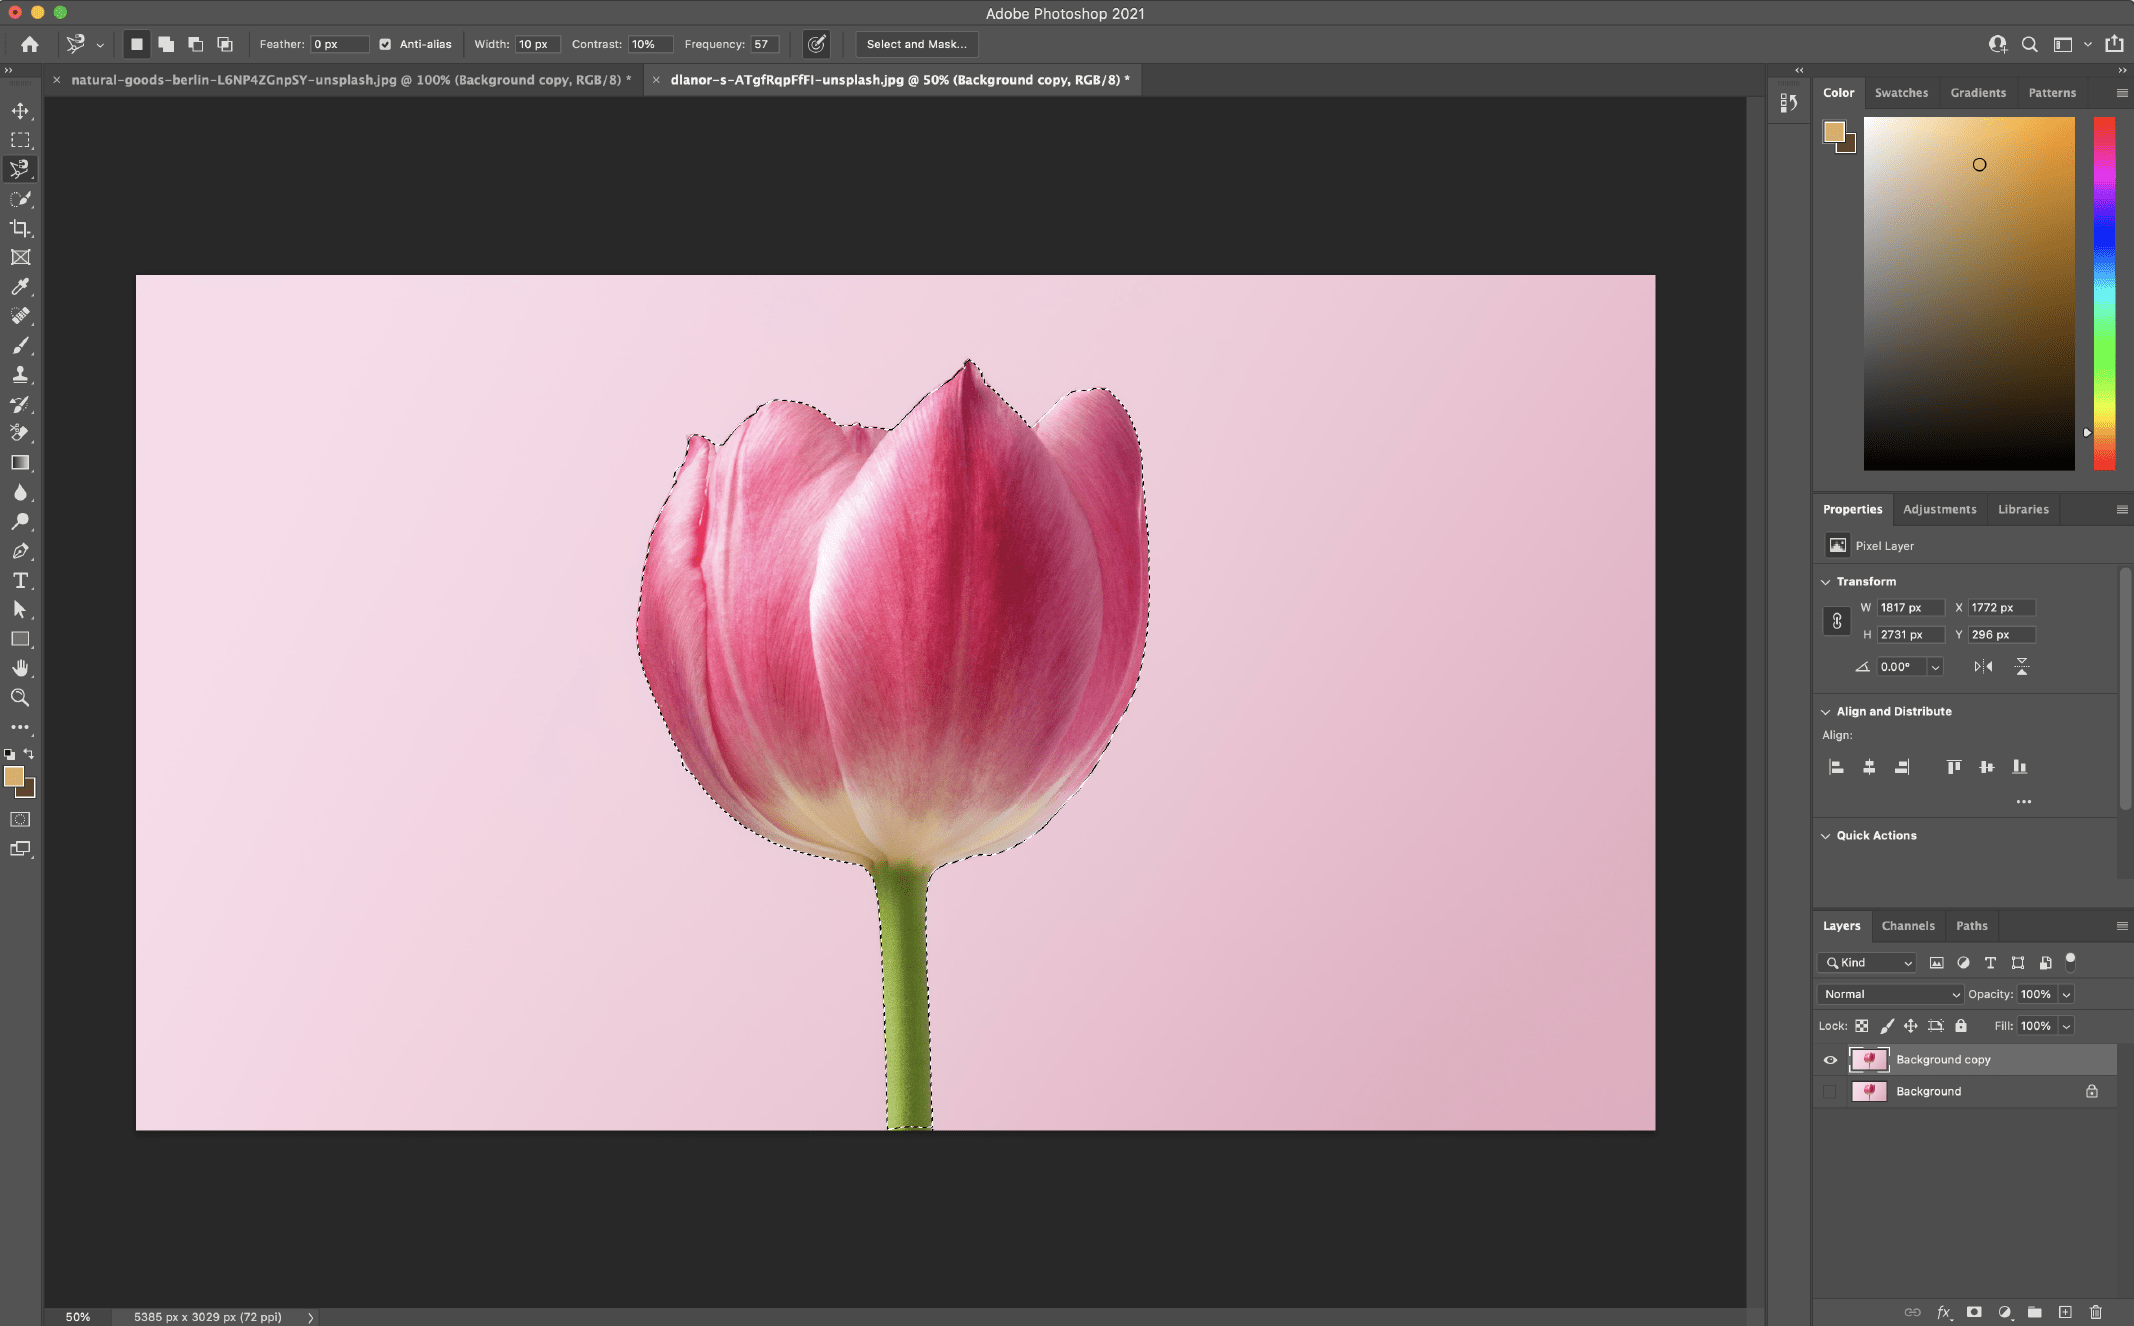
Magnetic Lasso Machine Steps
- Collectively alongside along with your picture open in Photoshop, appropriate click on on in your Background layer and click on on on Duplicate Layer. All through the dialog space that pops up, title your layer (no matter you’d like), and click on on on OK. Click on on on the attention icon to the left of the distinctive layer to point that layer off.
- Choose the Magic Lasso instrument from the toolbox on the left. Begin drawing alongside the sting of your topic with the instrument. You’ll see it will begin drawing the trail for you as you progress your cursor. Persistence is essential correct proper right here, as you’ll need to be gradual, frequent, and deliberate alongside alongside along with your strikes.

- When you’ve began the instrument, you’ll should go spherical your topic fully and hook up alongside along with your start line. When you’ve made it as soon as extra spherical to the start, click on on on the place to begin. The choice will then flip into marching ants spherical your choice.
- Save your choice by going to Choice > Save Choice and giving it a fame.
- To delete the background, go to Choose > Inverse to invert the marching ants (they need to now be working all through the perimeter of the picture and your topic). Click on on on delete. You can now see the white/grey checkered background instead of your earlier background.
Must you happen to primarily actually really feel it will be significant make changes to the choice, it is doable you will backtrack only a few steps and redo them to get bigger outcomes, or use a mixture of varied strategies listed on this textual content to get you nearer to your required consequence.
For added detailed details about how the Magnetic Lasso instrument works, take a look at this Adobe tutorial.
Picture credit score rating score: Dlanor S on Unsplash
This instrument is sweet to make the most of hwne the topic is considerably contrasted and/or the picture has “wispy” or intricate particulars, or once you need to save time and wish respectable accuracy and the flexibleness to shortly refine.
The Fast Choice instrument is perhaps my favourite methodology correct proper right here on account of it’s the quickest approach to determine on a topic and permits for sooner refinements. It furthermore could also be utilized on a tons wider fluctuate of potential footage than fully totally different strategies listed correct proper right here, on account of it truly works by detecting coloration adjustments to hunt out out the place the choice must be.
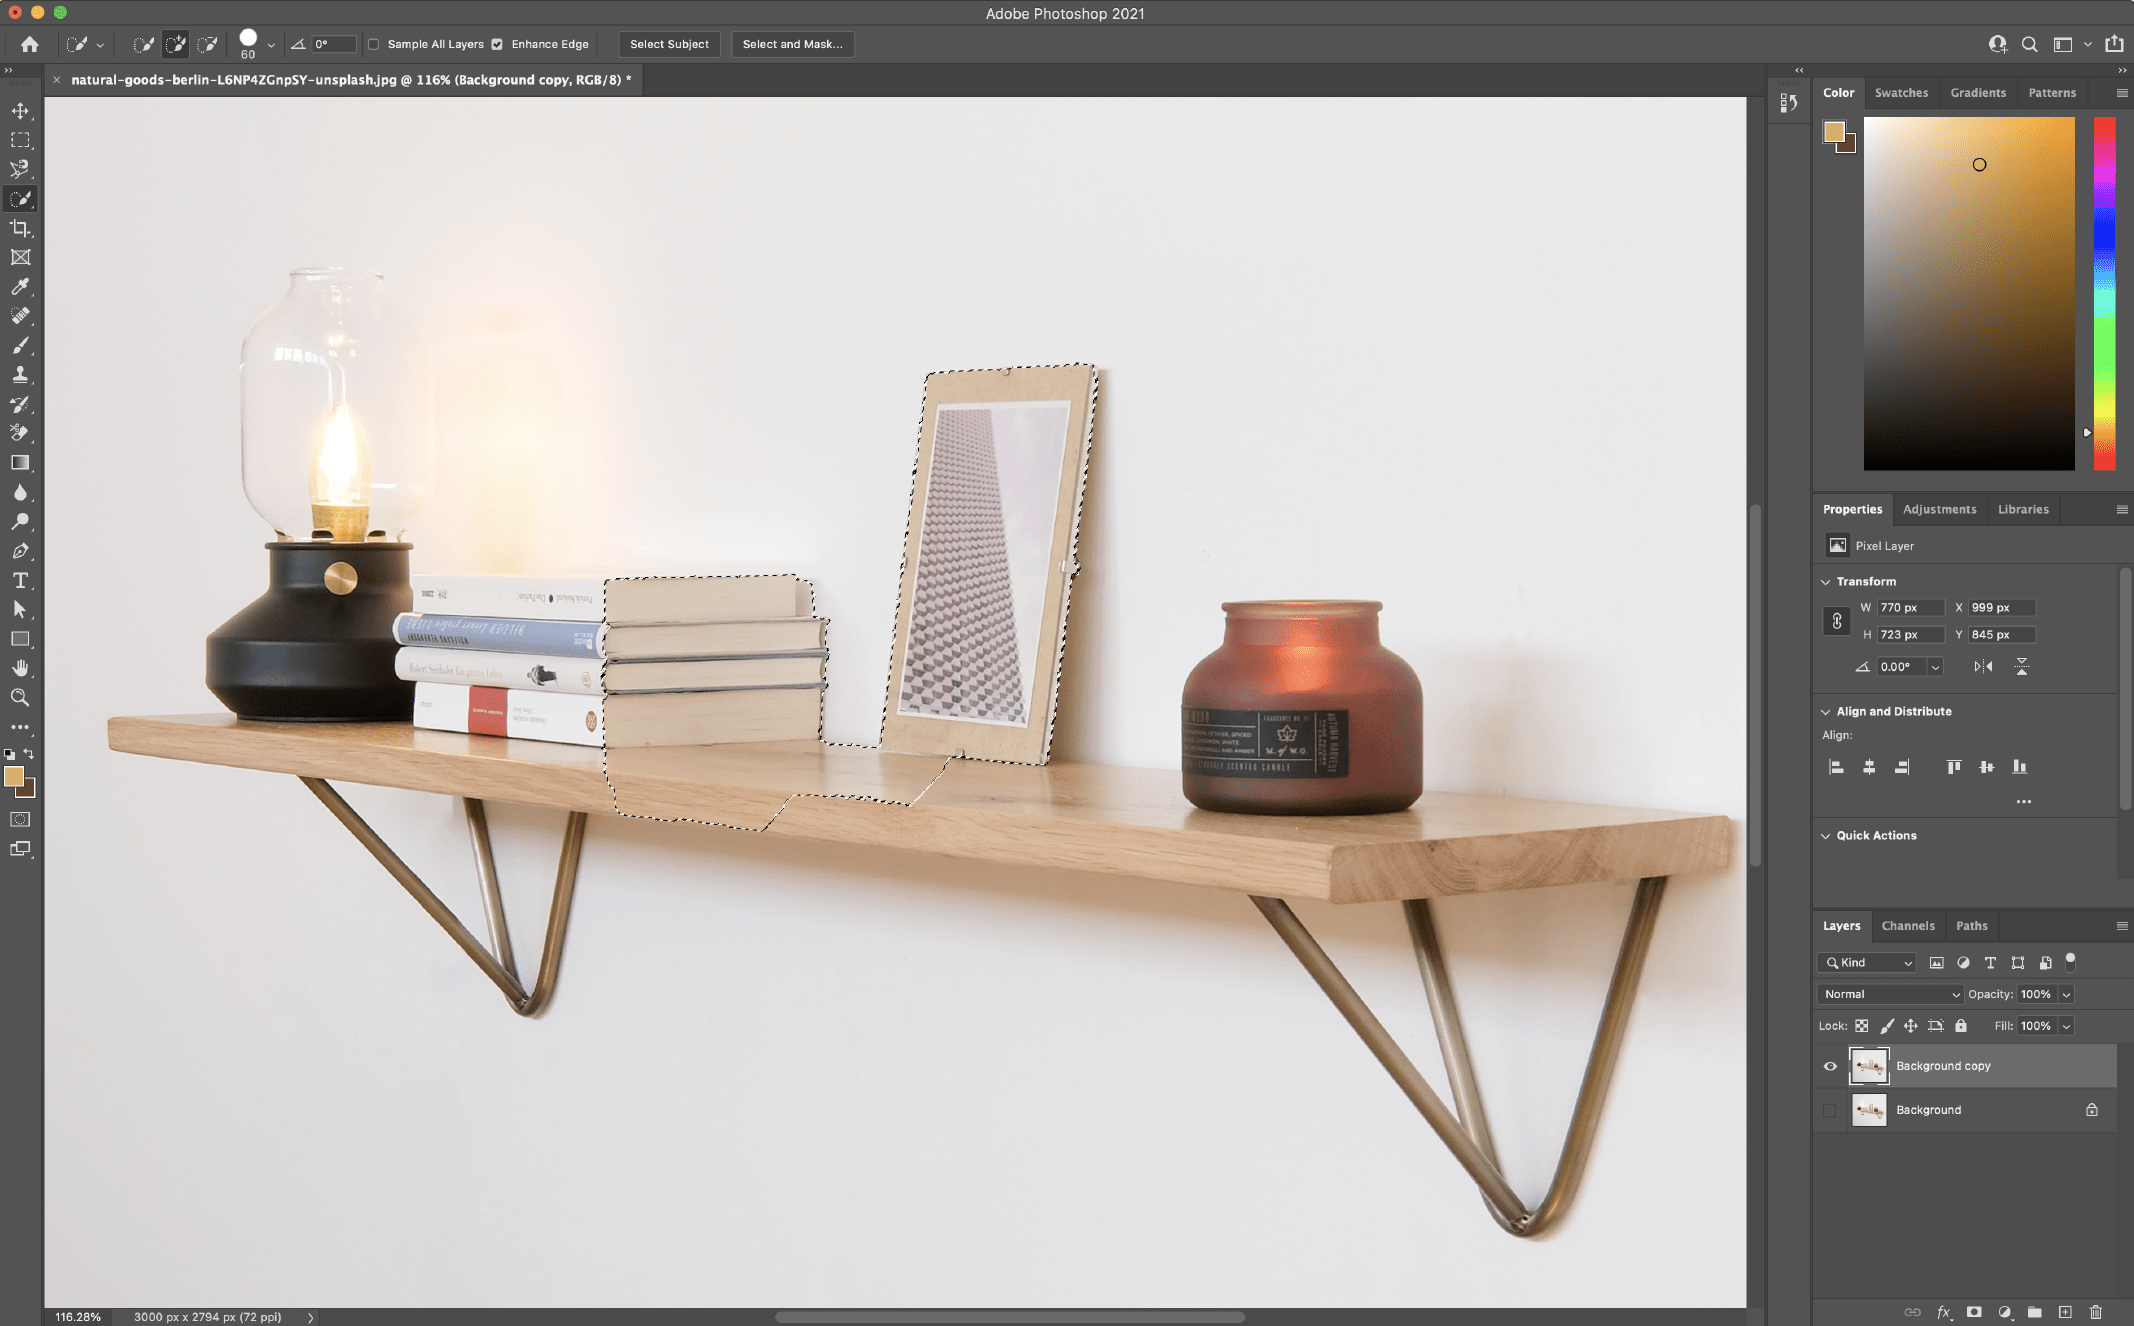
Fast Choice Machine Steps
Eradicating a Background Picture with the Fast Choice Machine
- Duplicate the picture layer
Collectively alongside along with your picture open in Photoshop, right-click your Background layer and click on on on Duplicate Layer. All through the dialog space that pops up, title your layer (no matter you’d like), and click on on on OK. Click on on on the attention icon to the left of the distinctive layer to point that layer off.
- Choose the Fast Choice instrument
Choose the Fast Choice instrument from the toolbox on the left (could also be hidden beneath the Object Choice instrument).
- Paint the topic of the picture
Utilizing the instrument, begin portray your topic. You’ll see the marching ants begin displaying when you paint. To handle your instrument measurement, use the [ or ] keys to lower or enhance the size.
- Clear up the choice path
Must you happen to seek out you’ve painted open air of the topic, click on on on and protect the Choice key (macOS) or Alt key (Home residence home windows) and as well as you’ll see the middle of the instrument flip from a
+image to a-image, indicating it will now take away from the choice. Paint on the a part of the choice you need to take away whereas holding the Choice/Alt key.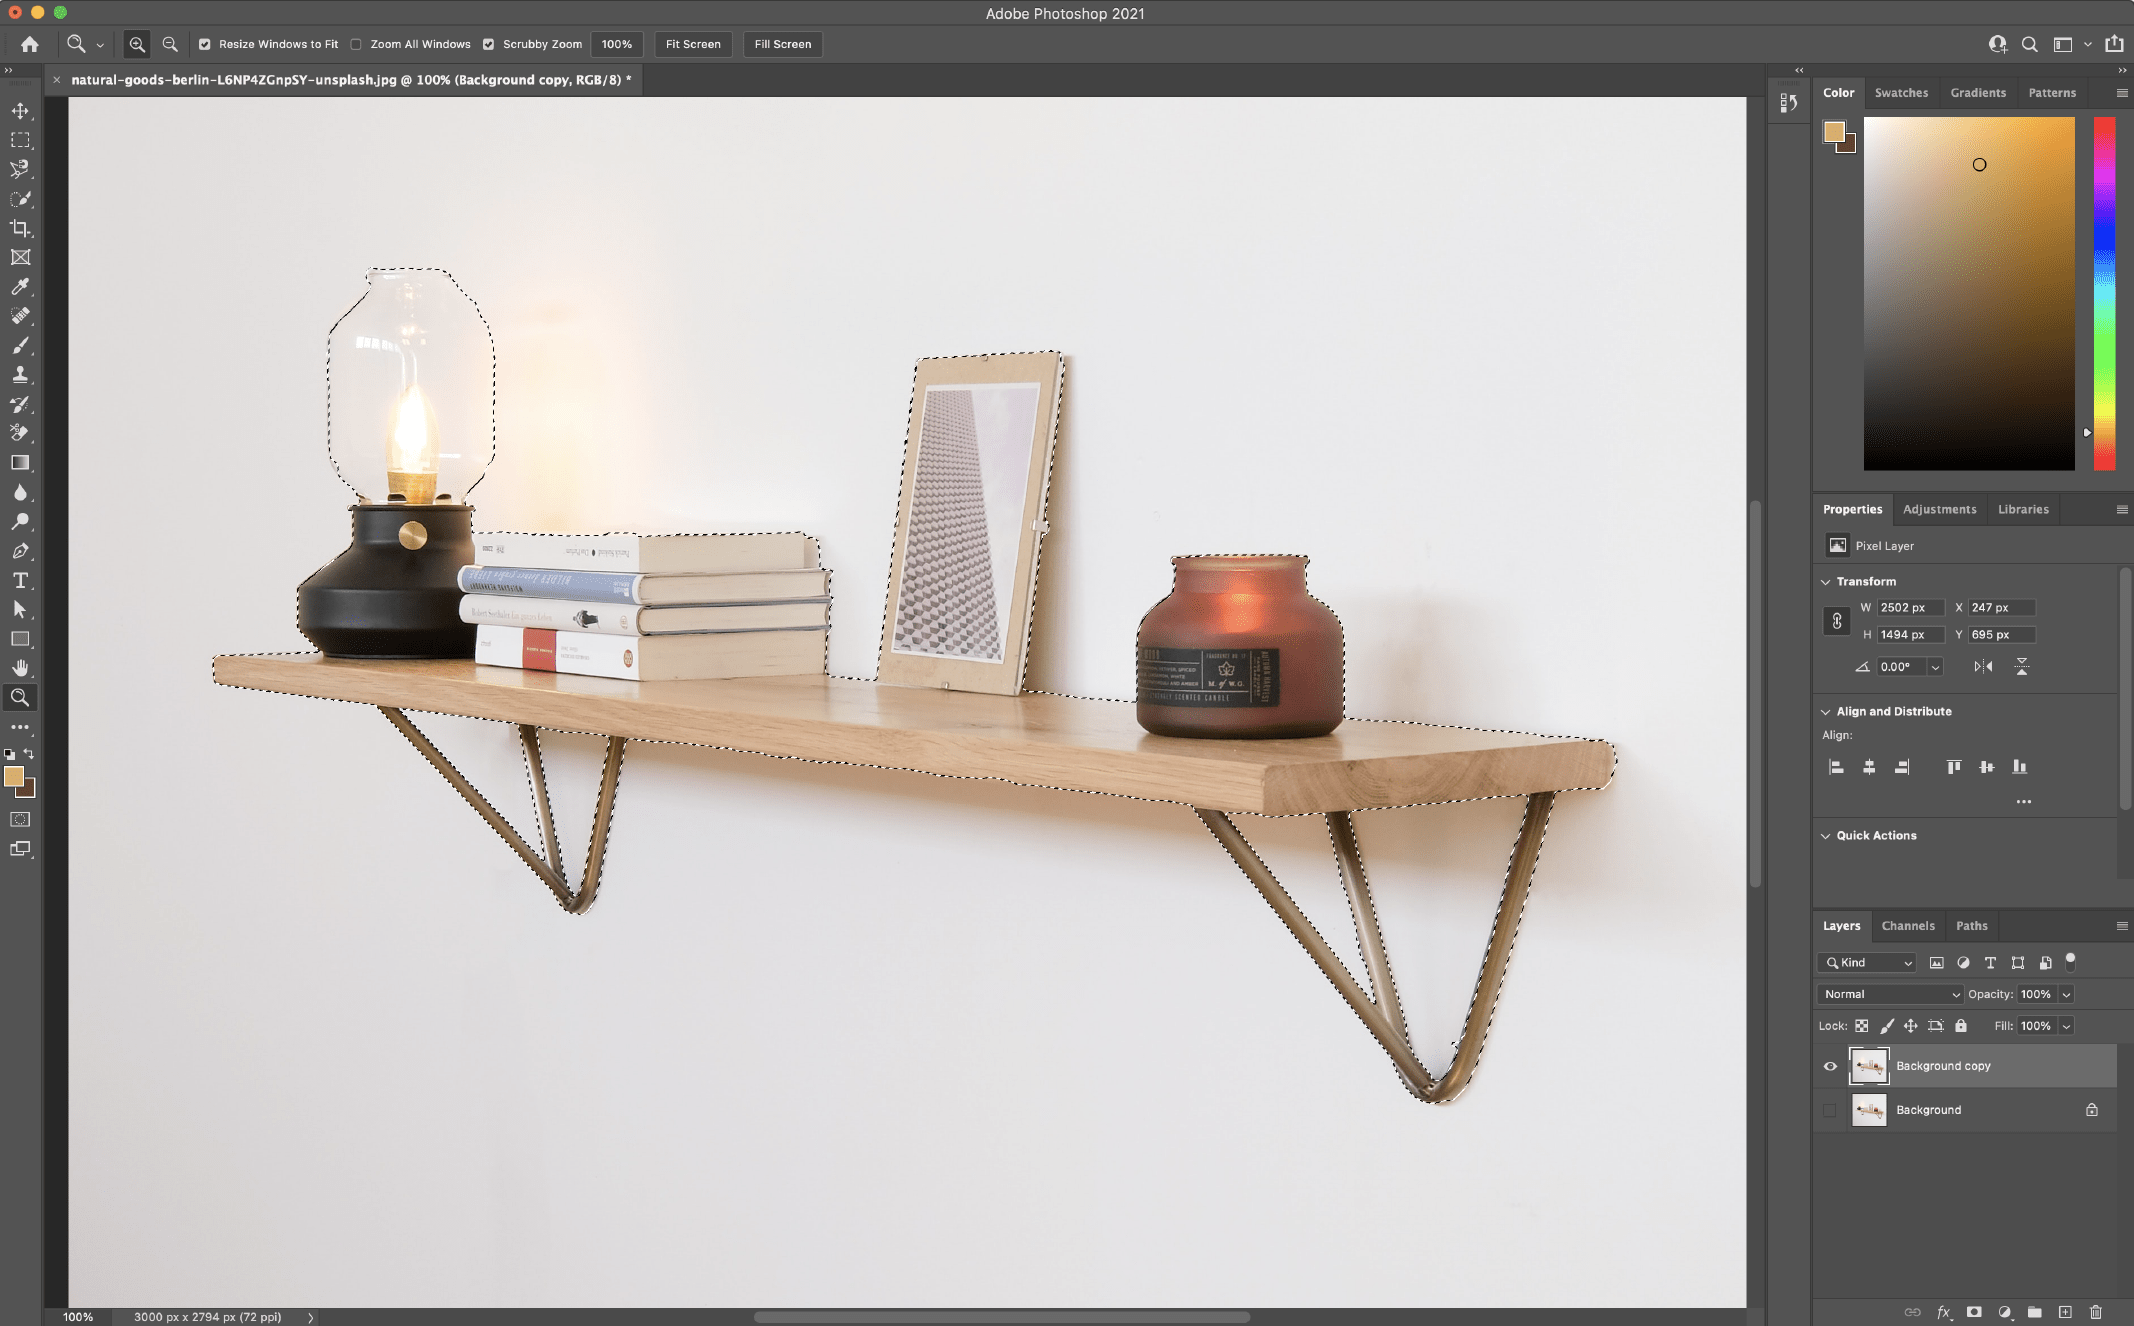
- Save your choice
Save the choice by going to Choose > Save Choice and giving it a fame. That is in case you need to come as soon as extra and make changes.
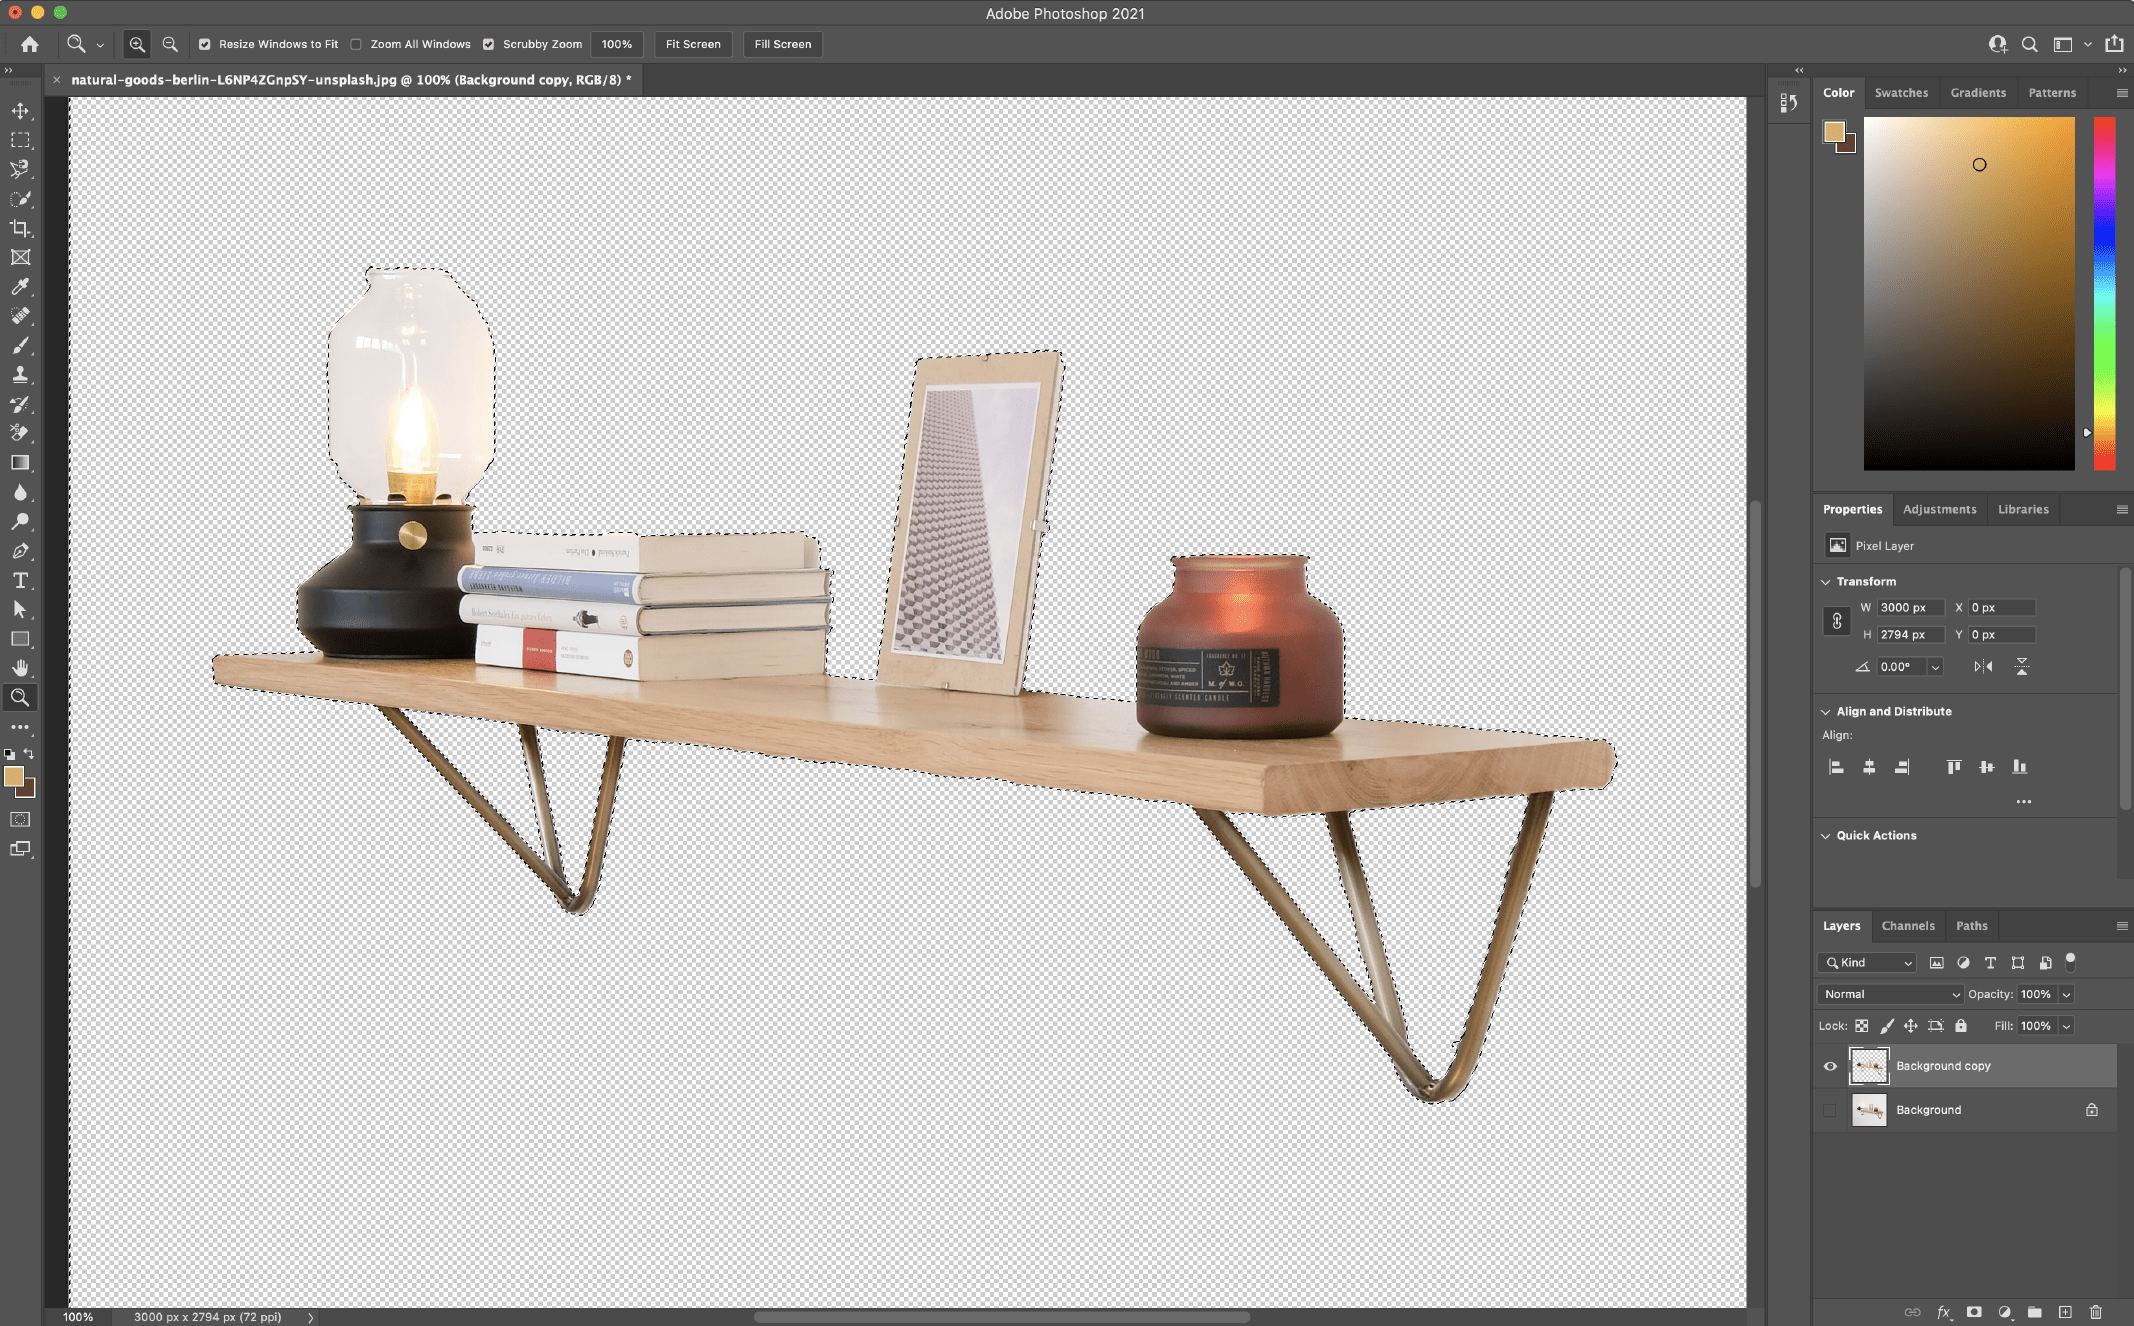
- Delete the background
To delete the background, go to Choose > Inverse to invert the marching ants (they need to now be working all through the perimeter of the picture and your topic). Click on on on delete.
Must you happen to seek out you’ve missed a spot or want additional refinements, it is doable you will backtrack only a few steps to do the refinement and resave your choice and try as quickly as further.
For added detailed info on how the Fast Choice instrument works, take a look at this Adobe tutorial.
Picture credit score rating score: Pure Devices Berlin on Unsplash
Eradicating a Background in Photoshop Has By no means Been Simpler
By the use of these strategies in Photoshop, it has under no circumstances been simpler to take away a background from a picture. Whether or not or not or not you’re in quest of a fast and straightforward approach to tug a topic out of {{a photograph}}, in every other case you want a way to substitute the background of a further detailed picture, the strategies above will help you get to your finish consequence tons sooner and with bigger outcomes.
Figuring out which methodology to make the most of and when is simply not going to solely make your workflow go tons sooner, nonetheless you’ll furthermore find yourself with a significantly greater last picture.
Lastly, relying in your final use case, if it will be significant save your picture with out the background, don’t neglect to position it aside as a clear PNG so that you need to use it in quite a few capabilities and keep your new background-free picture.
FAQs About Eradicating Backgrounds in Photoshop
How do I take away the background from a picture in Photoshop?
To take away the background from a picture in Photoshop, observe these steps:
Open Your Picture: Launch Photoshop and open the picture from which you need to take away the background.
Choose the Background: Use the choice instrument of your totally different to decide on the background you need to take away. The “Magic Wand” instrument or the “Fast Choice” instrument can work efficiently for easy backgrounds, whereas further tough backgrounds may require the “Pen Machine” for precise choice.
Refine the Choice: After deciding on the background, refine the choice utilizing the “Choose and Masks” choice or the “Refine Edge” instrument. This helps to clean out edges and make the choice further proper.
Take away the Background: As shortly as your background is chosen, press the Delete key (or Backspace on a Home residence home windows PC). It’s going to take away the chosen background.
Add a New Background (Optionally obtainable): It is doable you will every go away the background clear or add a mannequin new one. So as in order so as to add a mannequin new background, create a mannequin new layer and place it under the picture layer. Then, fill the mannequin new layer alongside alongside along with your desired background coloration or picture.
Last Touches: To make the edges of the topic mix seamlessly with the mannequin new background, you may want to make use of the eraser instrument or layer masks to additional refine the edges.
Save Your Picture: After you’re happy with the consequence, save your picture in a format that helps transparency (e.g., PNG) to protect the eradicated background.
These are the essential steps to take away a background in Photoshop. The precise units and strategies you take advantage of may differ relying on the complexity of the picture and your modifying preferences.
What instrument removes background in Photoshop?
In Photoshop, it’s essential to use the Take away Machine to take away backgrouns, as outlined in teh article above. Or it’s essential to use a mixture of choice units to manually isolate the background, after which delete or masks it. The gathering of choice instrument is ready by the complexity of the picture and the character of the background. Some often used choice units embrace:
Magic Wand Machine: This instrument selects pixels of comparable coloration with a single click on on on. It truly works efficiently for easy backgrounds with distinct distinction between the topic and background.
Fast Choice Machine: This instrument means which you possibly can paint over the realm you need to choose, and it mechanically detects the edges of the topic. It’s helpful for footage with further tough backgrounds.
Pen Machine: The Pen Machine is a precise choice for creating paths all through the topic. It’s notably helpful for intricate picks and issues with well-defined edges.
Lasso Machine: The Lasso Machine permits you to appeal to a freehand choice all through the topic. It’s useful for irregularly usual issues.
Choose and Masks (or Refine Edge): After making a variety, it’s essential to use the “Choose and Masks” choice (or “Refine Edge” in older variations of Photoshop) to fine-tune the choice and refine the edges, making the transition between the topic and the background smoother.
After utilizing these choice units to isolate the background, it is doable you will delete it or add a layer masks to cowl it. The precise methodology you take advantage of is ready by your required consequence. So, there isn’t a single instrument for background elimination, nonetheless barely a mixture of units and strategies to realize the specified affect.
How do I take away the background from a emblem in Photoshop?
To take away the background from a emblem in Photoshop, observe these steps:
Open Your Picture: Launch Photoshop and open the picture containing the emblem.
Choose the Emblem: Use definitely one among many choice units just like the Magic Wand, Fast Choice, or the Pen Machine to decide on the mannequin. Ensure that the mannequin is totally chosen, leaving the background unselected.
Refine the Choice: To make the mannequin choice further precise, go to “Choose” > “Choose and Masks” (or “Refine Edge” in older variations). Alter the settings to clean out the edges and enhance the choice as wanted.
Invert the Choice: With the mannequin chosen, go to “Choose” and select “Inverse.” This inverts the choice, so now the background is chosen instead of the mannequin.
Delete the Background: Press the Delete key (or Backspace on Home residence home windows) to take away the chosen background. The image should now be on a transparent background.
Save the Emblem: After you’ve eradicated the background, save the mannequin as a file format that helps transparency, akin to PNG, to protect the clear background. To do that, go to “File” > “Save As” and choose the specified format
How do I take away a white background in Photoshop?
To take away a white background in Photoshop, observe these steps:
Open Your Picture: Launch Photoshop and open the picture with the white background that you just merely need to take away.
Choose the Magic Wand Machine: Click on on on on the “Magic Wand” instrument contained in the Photoshop toolbar.
Tolerance Setting: Alter the tolerance setting contained in the picks bar on the prime. A decrease tolerance selects solely very related white tones, whereas a better tolerance selects a wider fluctuate of tones. Begin with a standard tolerance setting (e.g., 32).
Choose the White Background: Click on on on wherever on the white background. The Magic Wand instrument will choose all related areas of comparable coloration. In case your picture has anti-aliased edges or slight gradients, you’ll have to experiment with the tolerance setting to make sure the whole white background is chosen.
Refine the Choice (Optionally obtainable): After deciding on the white background, it is doable you will refine the choice by going to “Choose” > “Choose and Masks” (or “Refine Edge” in older variations). This lets you clear the edges and make any obligatory changes to the choice.
Delete the Background: Press the Delete key (or Backspace on a Home residence home windows PC) to take away the chosen white background.
Check out for Residual White Areas: After deletion, zoom in and try for any remaining white fragments or edges. Use the Eraser instrument or the Brush instrument with a gentle brush to clean up any undesirable white areas.
Save Your Picture: Save your picture in a format that helps transparency (e.g., PNG) to protect the background elimination. To do that, go to “File” > “Save As.”