
Node.js is an open-source, cross-platform JavaScript runtime setting permitting builders to assemble server-side options exterior a browser. It could possibly be used to assemble mission-critical manufacturing options that carry out terribly accurately. On this clever information, we’ll take a look at how one can create your internet server with Node.js.
Key Takeaways
- Implementing a simple internet server with Node.js. This information reveals put together and deploy an internet server utilizing Node.js. It walks by the use of every step, together with mission initialization, Explicit.js integration, and plenty of important decisions, offering a strong basis for anybody new to Node.js.
- Creating dynamic internet options. This information covers a wide selection of functionalities, akin to dealing with types, responding to particular person requests, and dynamically serving internet pages, which will be important to creating your internet options interactive and attention-grabbing.
- Exploring Node.js decisions. Dive deeper into Node.js’s choices for internet enchancment, together with work with static information, deal with errors, and implement type submissions. This information offers a clever method to utilizing Node.js to assemble feature-rich internet options.
Half 1: Downside Setup and Organize
Step 1: Organize Node.js and npm
To begin organising our internet software program program, guarantee you may have Node.js and npm put in in your system. Node.js offers a JavaScript runtime setting, whereas npm is the bundle supervisor for Node.js. Chances are high you may pay money for and prepare Node.js from the official web site.
To ensure that Node.js and npm are exactly put in, open your terminal and run the next instructions:
node -v
npm -v
Step 2: Initialize a mannequin new Node.js Downside
Create a mannequin new itemizing in your mission and initialize a mannequin new Node.js mission by working the next command in your terminal:
mkdir book-club
cd book-club
npm init -y
This command will create a bundle.json file in your mission. It may comprise metadata concerning the mission, together with its dependencies:
{
  "title": "book-club",
  "model": "1.0.0",
  "description": "",
  "predominant": "index.js",
  "scripts": { "take a look at":
  "echo "Error: no take a look at specified" && exit 1" },
  "key phrases": [],
  "creator": "",
  "license": "ISC" }
Step 3: Organize Explicit.js
Explicit.js is a well-liked internet framework for Node.js, with decisions for organising internet and cell options. The command beneath installs Explicit.js and affords it as a dependency in your bundle.json file:
npm prepare categoricalHalf 2: Setting Up the Explicit Server
Step 1: Create a mannequin new file for the server
Now that the mission is ready up, create a mannequin new file named app.js contained in the mission itemizing. This file will comprise the code for the Explicit server.
Step 2: Import Explicit.js
On the prime of your app.js file, import the Explicit.js module:
const categorical = require('categorical');Step 3: Create an Explicit software program program
Subsequent, create an occasion of an Explicit software program program:
const app = categorical();The categorical() perform is a top-level perform exported by the Explicit module. It creates an Explicit software program program, which we assign to the app variable.
Step 4: Outline a route
Outline a route for the trail / with a simple message when accessed:
app.get("https://www.sitepoint.com/", (req, res) => {
 res.ship('Whats up World!');
});
Correct proper right here, app.get() is a perform that tells the server what to do when a GET request is made to a particular path, on this case, /. This perform takes two arguments: the trail and a callback perform that takes a request and a response.
Step 5: Begin the server
Lastly, let’s begin the server on port 3000:
const port = 3000;
app.hear(port, () => {
 console.log(`Server is working at http://localhost:${port}`);
});
The app.hear() perform begins the server and makes it hear for requests on the required port.
Half 3: Creating the Utility Effectivity
Now that we now have the Explicit server put together, let’s begin organising the making use of’s effectivity by creating just a few fully fully totally different routes.
Step 1: Create a mannequin new file for messages
In your mission itemizing, create a mannequin new file named messages.js. This file will comprise the messages that your server will ship as responses:
module.exports = {
 dwelling: 'Welcome to our E e book Membership!',
 about: 'About Us',
 notFound: '404 Not Discovered'
};
Step 2: Import messages into your server file
On the prime of your app.js file, import the messages:
const messages = require('./messages');Step 3: Use messages in your routes
Now, use these messages contained in the routes:
app.get("https://www.sitepoint.com/", (req, res) => {
 res.ship(messages.dwelling);
});
app.get('/about', (req, res) => {
 res.ship(messages.about);
});
app.use((req, res) => {
 res.standing(404).ship(messages.notFound);
});
Correct proper right here, app.use() is a technique that always often known as for each request made to the server. We’re utilizing it correct proper right here to deal with all routes that aren’t outlined and ship a 404 Not Discovered message.
Half 4: Along with Static File Serving
Step 1: Create a mannequin new itemizing for static information
Create a mannequin new itemizing named public. This itemizing will comprise all of your static information:
mkdir publicStep 2: Add some static information
For the purpose of this information, let’s add a simple HTML file and a CSS file. In your public itemizing, create a mannequin new file named index.html and add the next code:
DOCTYPE html>
html>
head>
title>E e book Membershiptitle>
hyperlink rel="stylesheet" selection="textual content material materials/css" href="/varieties.css">
head>
physique>
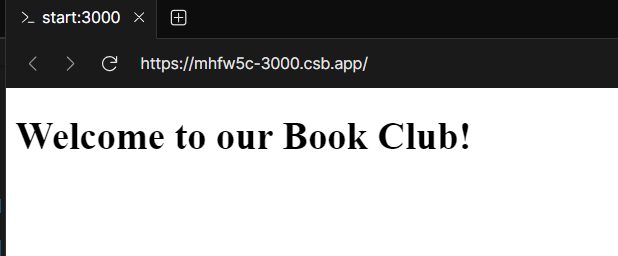
h1>Welcome to our E e book Membership!>/h1>
physique>
html>Furthermore, create a mannequin new file named varieties.css contained in the public itemizing and add the next code:
physique {
  font-family: Arial, sans-serif;
}
Step 3: Use categorical.static to serve static information
Add the freeway beneath to the app.js file, earlier than the route definitions:
app.use(categorical.static('public'));The categorical.static perform is a built-in middleware perform in Explicit.js. It serves static information and takes the itemizing title from which it’s essential to serve information as an argument.
Half 5: Dealing with POST Requests
Step 1: Add a kind to index.html
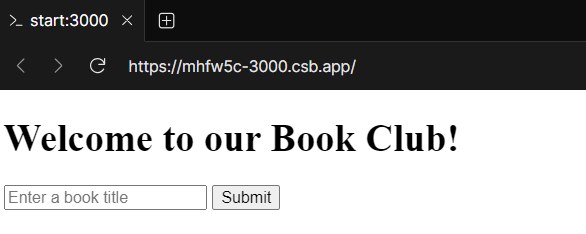
In your index.html file, add a kind with a single enter house and a submit button:
type motion="/submit" technique="put up">
  enter selection="textual content material materials" title="info" placeholder="Enter a info title">
  button selection="submit">Submitbutton>
type>
This type will ship a POST request to the /submit path. The request physique will embrace the enter house’s value.
Step 2: Organize body-parser
It’s worthwhile to rearrange a middleware typically often known as body-parser to deal with the info despatched contained in the POST request:
npm prepare body-parserStep 3: Import and use body-parser
Import body-parser into the app.js file:
const bodyParser = require('body-parser');
app.use(bodyParser.urlencoded({ prolonged: false }));
The bodyParser.urlencoded() perform parses incoming request our our our bodies obtainable beneath the req.physique property.
Step 4: Deal with POST requests
Now, create a mannequin new endpoint to deal with this POST request contained in the app.js file:
app.put up('/submit', (req, res) => {
  const info = req.physique.info;
  console.log(`E e book submitted: ${info}`);
  res.ship(`E e book submitted: ${info}`);
});
Half 6: Along with a Information Retailer
On this half, we’ll add a simple information retailer to our software program program to retailer the books that prospects submit. We’ll use an array to retailer the info for simplicity.
Step 1: Create a info retailer
On the prime of your app.js file, create an array to retailer the books:
const books = [];Step 2: Change POST request handler
Change the handler for POST requests so as in order so as to add the submitted info to the books array:
app.put up('/submit', (req, res) => {
    const info = req.physique.info;
    books.push(info);
    console.log(`E e book submitted: ${info}`);
    res.ship(`E e book submitted: ${info}`);
});
Step 3: Create a path to view all books
Create a mannequin new route handler that returns all of the submitted books:
app.get('/books', (req, res) => {
  res.ship(books.be part of(', '));
});
Phrase: in a real-world software program program, you’ll in all probability retailer your information in a database. Correct proper right here, the info contained in the array will perhaps be misplaced each time you restart your server.
Half 7: Along with Error Dealing with
On this half, we’ll create an error handler. Explicit.js offers a built-in error handler. Nonetheless you would as properly create your explicit individual error dealing with middleware.
Step 1: Create an error dealing with middleware
In your app.js file, add the next code on the top of the file:
app.use((err, req, res, subsequent) => {
  console.error(err.stack);
  res.standing(500).ship('One issue Went Unsuitable!');
});
This middleware perform has 4 arguments as an alternative of the equivalent outdated three (req, res, subsequent). This perform typically often known as each time there’s an error in your software program program.
Step 2: Use the following perform to cross errors
In case you cross an argument to the subsequent() perform, Explicit.js will assume it’s an error, skip all subsequent middleware choices, and go straight to the error dealing with middleware perform:
app.put up('/submit', (req, res, subsequent) => {
  const info = req.physique.info;
  if (!info) {
    const err = new Error('E e book title is required');
    return subsequent(err);
  }
  books.push(info);
  console.log(`E e book submitted: ${info}`);
  res.ship(`E e book submitted: ${info}`);
});
This handler checks if a info title was offered contained in the POST request. If not, it creates a mannequin new Error object and passes it to the subsequent perform. This may possible skip all subsequent middleware choices and go straight to the error dealing with middleware.
Half 8: Serving HTML Pages
On this half, we’ll modify our software program program to serve HTML pages as an alternative of plain textual content material materials. This may possible mean you can create additional troublesome particular person interfaces.
Step 1: Organize EJS
EJS (Embedded JavaScript) is an easy templating language that lets you generate HTML markup utilizing plain JavaScript:
npm prepare ejsStep 2: Set EJS because of the view engine
In your app.js file, set EJS because of the view engine in your Explicit software program program:
app.set('view engine', 'ejs');This tells Explicit to make the most of EJS because of the view engine when rendering views.
Step 3: Create a views itemizing
By default, Explicit will look in an inventory named views in your views. Create this itemizing in your mission itemizing:
mkdir viewsStep 4: Create an EJS view
In your views itemizing, create a mannequin new file named index.ejs and add the next code:
DOCTYPE html>
html>
head>
    title>E e book Membershiptitle>
head>
physique>
    h1> message %>h1>
    type motion="/submit" technique="put up">
        enter selection="textual content material materials" title="info" placeholder="Enter a info title">
        button selection="submit">Submitbutton>
    type>
    h2>Submitted Books:h2>
    ul>
         books.forEach(perform(info) { %>
            li> info %>li>
         }); %>
    ul>
physique>
html>
The placeholder is used to output the worth of the message variable.
Step 5: Change POST request handler
Change the POST /submit route handler so as in order so as to add the submitted info to the books array and redirect the person as soon as extra to the house internet internet web page:
app.put up('/submit', (req, res) => {
  const info = req.physique.info;
  books.push(info);
  console.log(`E e book submitted: ${info}`);
  res.redirect("https://www.sitepoint.com/");
});
Phrase: It’s an excellent observe to redirect the person after a POST request. That’s known as the Put up/Redirect/Get sampleand it prevents duplicate type submissions.
Step 6: Change the house route
Change the GET / route handler to cross the books array to the index.ejs:
app.get("https://www.sitepoint.com/", (req, res) => {
   res.render('index', { message: messages.dwelling, books: books });
});
Step 7: Change the house route
Now it’s time to run the making use of and see it in motion.
You’ll begin the server by working the next command in your terminal:
node app.jsYou could possibly see a message saying Server is working at http://localhost:3000 contained in the terminal.

Now, as an alternative of working node app.js you may title npm begin:
npm begin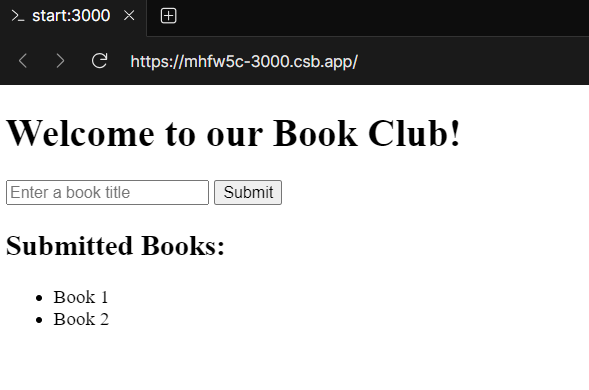
Conclusion
Congratulations! You’ve constructed an internet software program program with Node.js and Explicit.js. This software program program serves static information, handles fully fully totally different routes, makes use of middleware, and extra.
In case you’d like to do this out to your self, or have to uncover the code, checkout this CodeSandbox demo.
There’s tons additional you can do with Node.js and Explicit.js. Chances are high you may add additional routes, hook up with fully fully totally different databases, assemble APIs, create real-time options with WebSockets, and much more. The possibilities are limitless.
I hope this information has been useful. Glad coding!
Steadily Requested Questions (FAQs)
How can I deal with routing in a Node.js internet server?
You need to use the http module deal with routes manually by checking the request object URL. Nevertheless, as options develop to be additional troublesome, it is strongly advisable to make the most of a framework like Explicit.js. It helps you outline routes primarily based completely on HTTP strategies and URLs in a modular and clear technique.
How can I implement real-time communication in a Node.js internet server?
Exact-time communication in a Node.js internet server will possible be carried out utilizing WebSockets. The socket.io library is in sort for along with WebSocket assist to a Node.js server. It permits real-time, bidirectional, event-based communication between purchasers and the server.
What's the finest strategy to cope with database operations in Node.js internet servers?
Certainly one of many best strategies to cope with database operations in Node.js is to make the most of ORM (Object-Relational Mapping) or ODM (Object Doc Mapping) units. They supply high-level abstraction for database interactions and simplifies connection pooling, question organising, and schema validation.
For SQL databases: Sequelize, TypeORM
For NoSQL databases: Mongoose, Couchbase
How can I deal with errors globally in an Explicit.js software program program?
World error dealing with in an Explicit.js software program program will possible be carried out by defining a selected middleware perform with 4 arguments: (err, req, res, subsequent). This middleware must be added in any case app.use() and route calls. Inside this perform, you may log the error, set the response standing code, and ship as soon as extra an error message.
How are you going to ensure {that a} Node.js internet server is scalable?
There are a selection of methods to confirm the scalability of a Node.js internet server:
Utilizing the cluster module to be taught from multi-core methods.
Optimizing code and database queries.
Implementing caching methods.
Utilizing load balancers to distribute web page company all by way of a wide range of app circumstances.
Moreover, designing the stateless software program program permits horizontal scaling by along with additional circumstances as wished.